Jet Jon
Page 1Instructions For Cutting Up Your Old Kawasaki Jetski
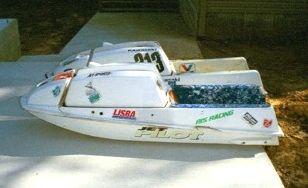
Buying a Jetski
If you haven't already purchased a Jetski let's to take a minute or two to talk about finding and purchasing the right canidate. First, you gain nothing by buying a good looking Jetski with a blown engine. Don't be concerned about the external appearance, in fact, ugly is better because you'll get a better price! Anything you save buying a Jetski that needs engine repairs will soon turn into a loss as one thing leads to another and you put several hundred into the engine before you even get started.
Although you don't really need a title (some states do register the enigne) at least know where the Jetski came from to ensure you are not buying stolen property. However, it is understandable when you buy a ski that's been sitting a few years that the title could be lost somewhere in the family's paperwork. No problem, but at least get a bill of sale!
As a general rule you should be able to find a good running JS550cc Jetski in the $500 price range. Buying a "ugly" ski might even let you get down to the $200 range. You could opt for a 300cc or 400cc engine, but you are going to find they weigh very close to the 550 and use about the same fuel - so there's no real reason not to go with the 550. If you are careful selecting a Jetski with a good engine - the 550 engine alone can easily be sold for more than you paid for the whole Jetski when it's time to upgrade.
Look at the links section on Jet Jon, I post listing of skis for sale whenever I find one meeting our criteria. Jet Ski classified is a good source for cheap Jetskis. But remember prices will be better in the winter.
Getting Started
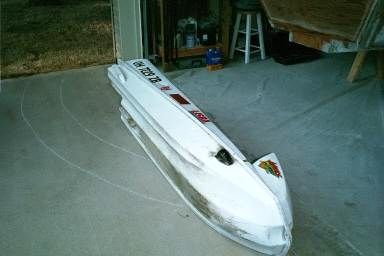
The basic difference in your project and mine is I'm starting with a completely stripped hull. I've used my old Jetski hull on two projects and all the the cutting and glassing has left it "shop worn" to the point that it needed to be replaced. Tim Webb - builder of the Webbjet 14 was kind enough to give me, not one, but two JS550 hulls!
While I'm talking about Tim, he has developed a great method of adding Jetski power to boats. My goal is to show you how to complete the project with common tools in your garage using a Jetski hull for engine mounts, inlet, water seals, etc. Tim's method eliminates all but a small portion of the orignal Jetski Hull. His plans are available at Webbjet14 and I encourage you to compare the two methods and select the one that best suites your needs.
The hull I'm using appears to be late eighties, it has the through hull exhaust which I think was introduced after 1986. Minor scratches and gouges on the bottom should be expected as normal wear and tear. Cracks on the sides and patches on the bow area are also very common and nothing to worry about. However, you should avoid using hulls with major cracks on the bottom, engine mount areas, pump mount areas, and especially on the bulkhead in the drive shaft mount area. If your Jetski has cracks in any of these areas to such extent there is concern about hull integrity, you should not use my method.
Tim Webb gave these two hulls to me. Thanks Tim!
Tools
There's more than one way to do just about anything. This project is no different. The tools I used are the tools I had on hand. You can "get by" with far less.
- Extension Cord
- Saws All
- Skill Saw
- Jig Saw
- Hand Saw
- Wood Chisel (old one)
- Metal Ruler
- Tape Measure
- Pencil or marker
- Duct tape or masking tape
- Four clamps
- Small hammer
- Ratchet and socket
Materials
Like the tools, you could probably get by with less materials by cutting strips from fiberglass cloth rather than buying fiberglass tabe. Look at the Fiberglass Stuff link a cheap and reliable material source.
- 2 Quarts - epoxy resin and hardener
- 1 Yard - satin weave boat cloth
- *2 Quarts - talc
- *1 Quart - phenolic microballoons
- 10 Yards - 3" fiberglass tape
- 3 Yards - 6" fiberglass tape
- Freezer bags
- 20 - 2"x1/4"lag bolts, flat washers, lock washers, and nuts
- Sandpaper
*Used for seam filler, 2 parts talc, 1 part microballoons, add resin and mix to thick batter, place in freezer bag, cut off corner of bag and squeeze to apply sealer.
Time to Cut!
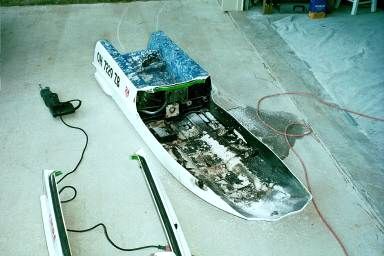
After removing All the mechanical components (consult your Kawasaki repair manual) it's time to begin making the cuts! Looking ahead will help you see where we are going.
1. Tilt the Jetski hull on its side.
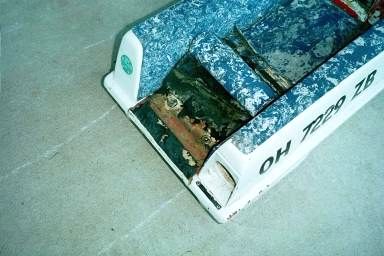
2. Look on the inside to find and mark the driveshaft support bulkhead location. You don't want to cut this! Bulkhead Detail
3. Mark the area where you will remove the bow section. The final cut off point will be even with the forward edge of the engine mount stiffners, so make this "rough" cut a bit longer. Forward Edge Detail
4. Remove the rubber ride pad if you have one. I found pushing a chisel under the mat worked ok.
5. Using the Saws All (or a handsaw you don't like) cut off the joining edge of the two hulls. Neatness doesn't count.
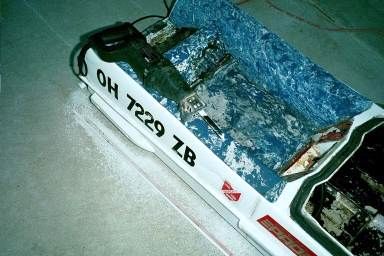
6. Remove the top portion of the forward hull. Start about four inches in front of the bulkhead and cut just under the area where the hulls are joined all the way around to the other side. You will trim more later so it doesn't have to be straight. Side Detail
7. Starting three inches behind the bulkhead, make a vertical cut through the side of the ride area. Neatness doesn't count.

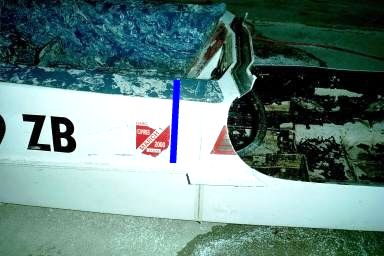
8. Starting at the back, saw forward just below the hull joint to the previous vertical cut. Cut level to avoid damaging drain lines inside the hull. Drain Line Detail

9. Once you've cut all the way around a sharp blow will break the floatation foam filling the side.
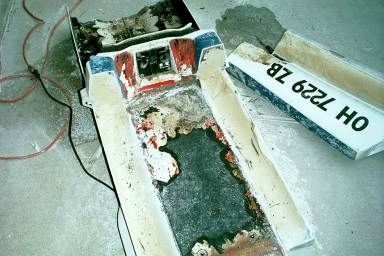
10. Repeat for the other side.