Building the Thunderbolt
by Mark Dietel
Page 3Construction was started by laminating the motor stringers and setting them up on the building form. The building form is nothing more than two saw horses that securely hold the motor stringers parallel to each other above the floor. A level was used to ensure alignment. Notches were cut into the motor stringers to accept the frame members. The frames were installed and the hull took shape in literally one evening!
Bending the longitudinal members around the
frames proved to be easy. The only exception is where the chine log meets
the stem. Here this member makes quite a bend and twist. This 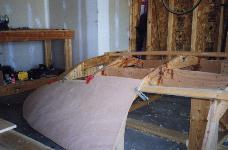 job would have been
much easier with a helper, one to hold the member in place while the
other sets the screws. My situation was compounded by the fact there is
only a couple of feet between the boat and the side of the garage (I
wanted room for a car). This prevented the chine log from being fastened
at the stem without being bent around the forward frames (as shown in the
Glen-L plans).
job would have been
much easier with a helper, one to hold the member in place while the
other sets the screws. My situation was compounded by the fact there is
only a couple of feet between the boat and the side of the garage (I
wanted room for a car). This prevented the chine log from being fastened
at the stem without being bent around the forward frames (as shown in the
Glen-L plans).
Fairing the members to accept the plywood
planking was a fun job. I used a hand-held power planer for a rough fit,
and finished with a standard Stanley block plane. Using a straight edge
and sighting along the members, it's relatively easy to determine
fairness. Installing the plywood planking was cake-work except where two
panels butt-join (as along the chine up front). In these areas, a hand
plane was used to gradually shape the panel to fit against the previously
installed member. As with most amateurs, some 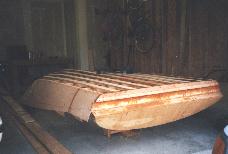 small gaps are
inevitable; these turned out to be of no consequence and filled in nicely
with epoxy. This design calls for full length 18' plywood panels. I
used standard 4 x 8 sheets with butt joints made at two places. These
butt joints required no fitting effort, as all other edges could overhang
for trimming after installation. No flat spots as a result of butt joint
backing plates are detectable in the finished surface.
small gaps are
inevitable; these turned out to be of no consequence and filled in nicely
with epoxy. This design calls for full length 18' plywood panels. I
used standard 4 x 8 sheets with butt joints made at two places. These
butt joints required no fitting effort, as all other edges could overhang
for trimming after installation. No flat spots as a result of butt joint
backing plates are detectable in the finished surface.