Cruisette: Builders' Diary, Part 5
Ron & Devy Porter
Continued
Days 48-50 ( May 22, 2006): Slow but sure...
It sure doesn't feel like we got a lot done this weekend. That's especially disappointing given that it was a long weekend (Victoria Day). Oh well, the work that did get done went smoothly and there were no obvious errors. In fact, I fixed a rather glaring error--I somehow missed putting on a proper keel-strip while the boat was upside-down. I actually thought I had done this, but reading about someone else's directional stability problem and its resolution sent me below to do it right. What would have been an hour or so with the hull upside-down took more like 5 or 6 hours. Sorry, no pictures: I tried, but there just isn't any way to get a decent picture of something like that from one foot away.
Here is a shot of the front deck from the aft cabin wall. You can see the side decking at the edges of the picture.
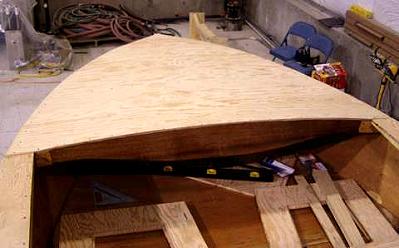
Here is an aerial shot showing the aft cabin wall and most of the side decking. Through the doorway, you can see a bit of the cabin's side walls nearly ready to install. You can also see I've added panels to fill in the holes that I thought were going to provide access to under seat storage. That didn't work out the way I expected, but filling them back in looks pretty simple.
Here is a shot of the complete berth. As you can see, there is no way to get decent exterior access to under-seat storage, which is why I'm closing these holes up permanently.
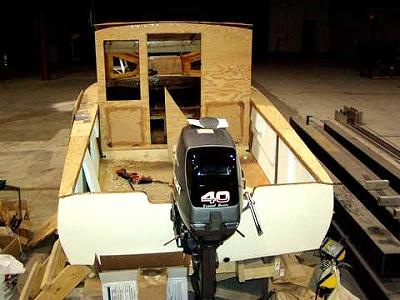
Days 51 and 52 (Jun 4, 2006): We got a motor!

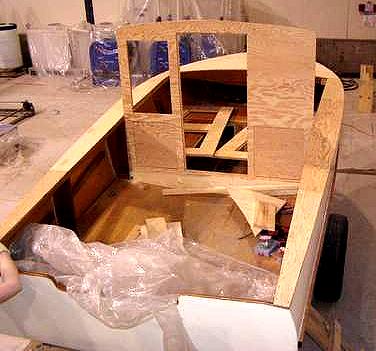
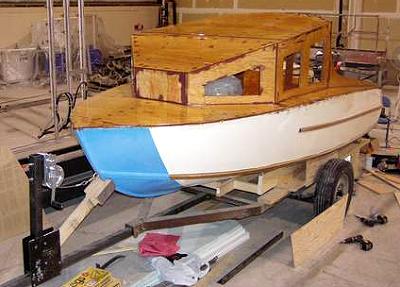
As you can see, we picked up the new motor! This is a new(!) 1999 Suzuki 40-hp two-cycle with oil-injection. My brother Dave came in with his half-ton to help me pick it up and hang it off the transom. Now that I see how it sits, I'll need to lift if off again to make things a bit more robust. Oh yeah, I've got the framing finished for the cabin.
OK, we did get some work done, too. All it needs now is a roof. I was afraid that it was going to look bulkier than it does, and I'm sure it'll be better once it's painted.
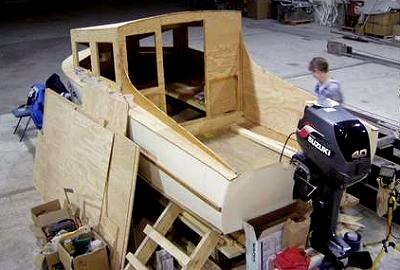
Days 53 and 54 ( Jun 11, 2006): The cabin roof and cockpit walls are in. Huge progress in relation to the actual labour :)
The results of this weekend's work are all out of proportion to the actual labour. I only cut four panels, two of which (the cockpit walls) I cut at the same time from sheets I had clamped together. Although, to be fair, one of the panels (the roof over the main part of the cabin) had to be built up from a couple of pieces with a butt-joint. Still, it didn't feel like a lot of work.
This first shot shows the floatation foam in the walls of the cockpit before we installed the walls themselves. I don't know how much good it does, but I've been working on the principle that any enclosed air-space needs to be filled with floatation foam, so I just did it. It's not like it adds much weight.
Here's a shot of the cockpit with the walls in place. And my sweetie and co-builder! If you are really paying attention, you'll notice that the cabin roof looks a bit different from the previous shot. There is a simple explanation for that--the roof has been installed instead of just sitting in place.
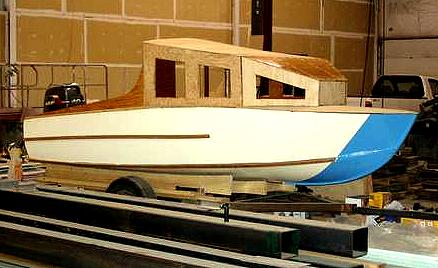
This shot is the first indication that maybe the lines of the original haven't been completely destroyed by raising the roof of the cabin. I put in a lot of time with scraps of lumber and sketches to get this look, so don't be too hard on me.

Here we can see how important those cockpit walls are. If you compare this shot with one from about the same angle last week, you can see the that most of the top-heaviness is gone. It's amazing, really, what a simple curve can do.
Last, but certainly not least, we have a shot of Devy hanging out the window, waving to her fans. She won't be able to do this after we install the windows. Every window will either be fixed (non-opening) or have a screen installed. In this case, the window will be fixed. The only opening windows are the front corner ones (the trapezoidal window in the centre of the shot) and the one at the back of the cabin beside the door.

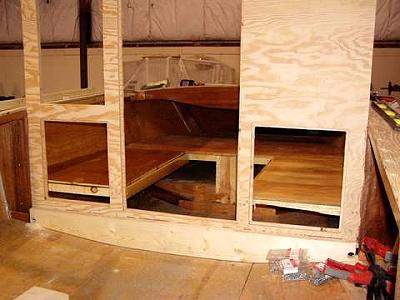
Days 55 and 56 ( Jun 21, 2006): The motor-well is done and the rear seats are roughed-in.
We've got the motorwell done and the rear seats are roughed-in. When it's finished, the seats will be on hinges so that we can get at the batteries on the starboard side and at the head on the port.. You read right--we're putting a portable toilet in under the port seat. Hey, we've got a berth up front, why not a head?
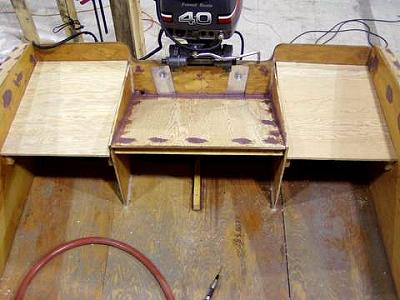
That little stick under the motor well is actually a permanent fixture. The gas tank I'm using has an indent just off the centre line, creating a dual chamber tank. The second chamber acts as a kind of reserve--if you run out of gas, just tip the tank a bit and the fuel from the second chamber will pour into the main chamber. Presumably that will get you back to shore. Anyway, I checked around and this tank design is quite common so felt confident in putting this in to fit the indent, thus preventing the tank from sliding side to side. By the time we're done, there will be other things to keep stuff from sliding forward.
Also, we're planning to eventually cut into the main side wall of the cockpit to create a foldout tray with a campstove attached. Toss a cooler under the berth and we'll be fully equipped for an overnight trip. I doubt that we'll actually do so on a regular basis, but it'll sure make getting storm-stayed a lot easier to take. And I'll be the envy of all the guys when we go on one of those rare fishing trips!

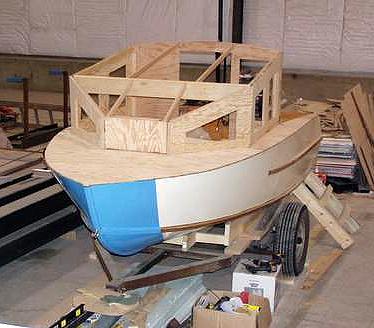
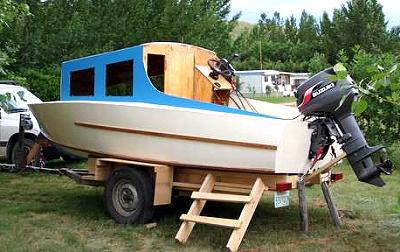
Days 57 and 58 ( Jun 25, 2006): The topside fiberglassing is done and the winch in installed.
This was a fiberglassing weekend. We got the 'glass on with no trouble at all, but by the time we got to the third coat of epoxy, things were slippery enough that being up on top of the cabin was just a tad nerve-wracking. There isn't really much to see, but it is shinier. I don't know whether we'll get to the paint next weekend or not. I still have to build fenders and install the trailer lights if we're going to haul it to the lake for vacation starting July 7.
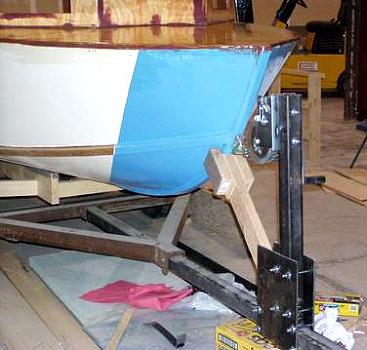
Installing the winch was actually pretty easy. I've been looking at a few different commercial boat trailers and some of them just clamp the winch stand in place instead of welding or bolting through the trailer tongue. I figure if the commercial folks can do that, then so can I. Needless to say, that makes it a lot easier to get everything positioned just right. One of the things I was supposed to get done this weekend was to balance the trailer with the motor mounted. I got lucky--the tongue weight is 55 pounds without having to move anything around. I was shooting for something between 50 and 100 pounds, so this worked out just right. I'm guessing that I'll be adding about 40 pounds more at the stern, but I'm also going to be putting the spare near the front of the tongue, so it should all work out. If not, the winch stand is easy enough to move and the bunk was designed to be adjustable fore and aft so there won't be any problems.
Days 63-65 ( Jul 16, 2006): Ready to launch!
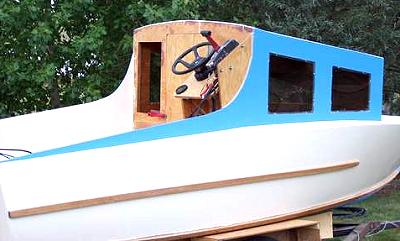
We got the helm and some windows in. And the door, too.
As you can see, this is really only suitable for standing, but I am planning to put a tall seat in there somehow. The door latch hasn't been installed yet. But neither has the rear window, so a clamp serves nicely for now. The tach is in the lower left and the Suzuki monitor (oil level, temp, over-rev warning) is in the top right.
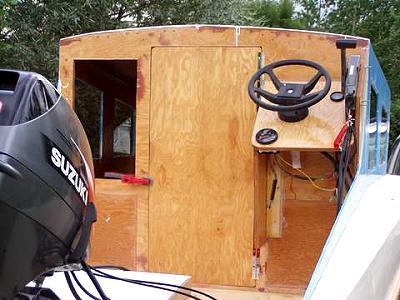
Here's a shot from the starboard. The windows are 1/4" smoke Lexan
Next issue: The Launch