Feedback: Zip
built by Nathan A. Miller
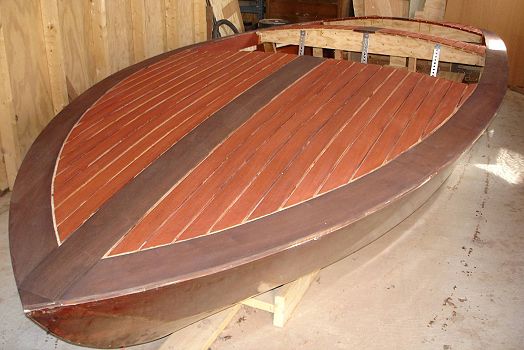
3/10/06 The deck ended up taking much less time than I thought… even with the birth of Dahlia Grace Miller in February 2006. Over the deck beams is a layer of ¼" plywood. I got a nice chunk of 8/4 Mahogany and some 4/4 Black walnut from Northland Forest Products in Manassas VA (northlandforest.com). The 2" deck strips were ripped ¼" thick from the edges of the 8/4 Mahogany and then epoxied to the plywood using screws and washers to hold them down while the epoxy set. The black walnut was ripped down to ¼" thick and then attached similarly. Used the Lockwood Dyes with about 7/8 part transparent red and 1/8 part Seal Brown for the deck strips and 7/8 Seal Brown and 1/8 part red for the covering boards. Of special note, Mark Bronkalla's description of the construction of his Riviera (bronkalla.com) was an invaluable resource in the decking process.
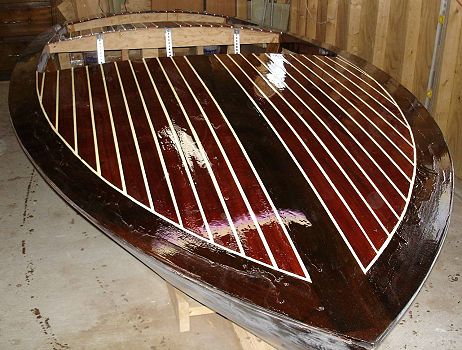
4/2/06 After some debate on the Glen-L Web-boards, I decided to use 3M Marine Caulk for the stripping vs. the epoxy mixture that Mark Bronkalla used in his Riviera. Major factor in the decision was that with a 2 month old baby, time was a very difficult thing to come by. In retrospect…. NOT A GOOD MOVE. After a year, some of the caulk has seeped into cracks under the planking in the summer heat and left just enough void to cause the subsequent layers of epoxy and varnish to crack. I definitely recommend using the epoxy fill mixture. At any rate, before caulking, I put down two coats of West 105/207, then caulked. AFTER caulking, I did a test section and found that my Epifanes high gloss varnish didn't cure in contact with the caulk (wish I did this BEFORE caulking the seams and then I would have probably gone with the epoxy mixture caulking!). At least I saved my bacon by finding that the 105/207 did cure over the caulk. So I put on 2 coats of epoxy first. Again, low temperatures caused sagging problems evident in this picture. After sanding out the runs, I put 3 coats of Epifanes on the whole thing.
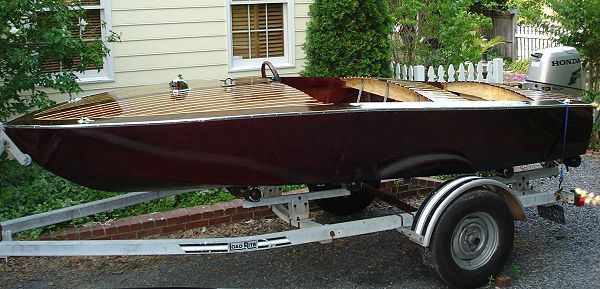
6/22/06 Got a group of 6 able-bodies to lug the boat out of the shop and onto the trailer (about 80ft to move). Man the boat was heavier than I thought! Fortunately we were able to turn the boat on its side (using the same flipping rig) and get it out the door, although I was prepared to cut away part of the wall if needed. An old sleeping bag between the varnish and concrete floor was a life saver and helped us scoot the boat along the floor at times without destroying the finish. I found a good deal on a Honda 4-stroke 25HP motor on E-Bay, though I had to try and figure out what little piece-parts were needed to change it from a tiller handle to remote steering unit. E-Bay was a huge help in finding great deals on a Teleflex NFB steering system and Honda remote throttle as well as the trailer. Had to do a bit of engineering work to get everything to work together but saved a lot of money in the end.
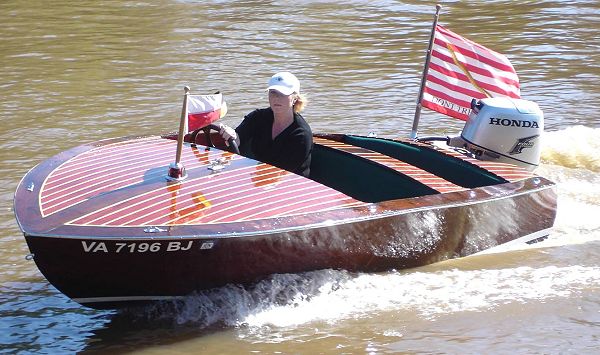
7/3/06 Launching day! Put Nine Lives in the Rappahannock River at the Fredericksburg City Dock. Everything went amazingly well… backed the trailer straight down the ramp and into the water. Motor started quickly and off I went! Despite all of the lessons learned in the caulking and coating process, you really can't tell unless you look very closely. Lots of comments from by-standers every time the boat goes in the water!
Didn't really know what to call her, but I didn't have a good pennant to put on her and I've always thought that Pennant 9 was the coolest looking signal flag in the bag… add that to our love of cats… and Nine Lives seemed to work out well.
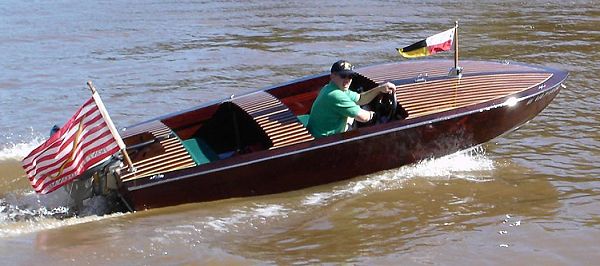
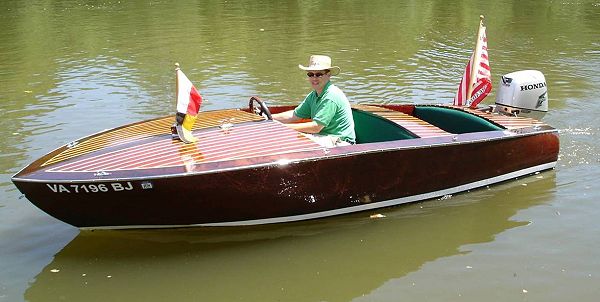
10/9/06: Took the boat down the Rappahannock river on a great fall day for some photo opportunities from the Little Falls Boat ramp. The little 25HP pushes the boat up to 27mph (by GPS) with 2 people. Starts to bog down a bit with four adults but still planes without a problem.