Feedback: Biscayne 18
built by John P. Maddox
12 August 1996
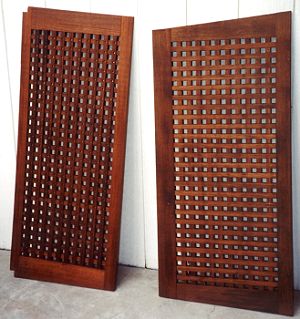
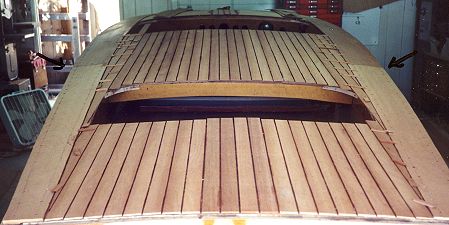
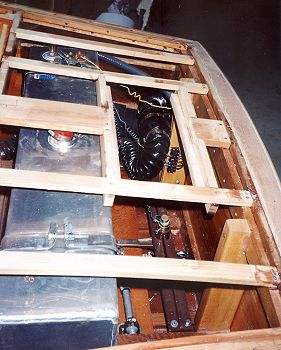 The second layer of the deck is on; covering boards and final layer next. I put a hatch behind the back seat in order to access the rudder port and other things that may need to be checked from time to time. Otherwise, there is no access since the gas tank is in the way if the back seat were removed. I have seen a rear hatch on a number of other boats, so I don't think it will look too bad. The teak floors turned out quite nice and look great in the boat.
31 March 1997
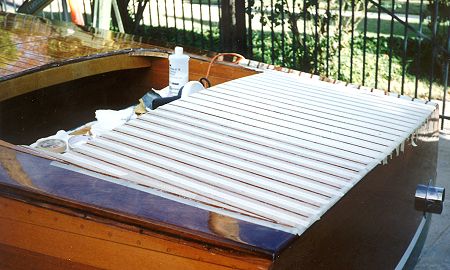
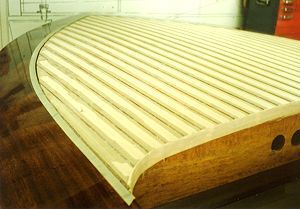
Instead of painting the lines on the deck, I went for the caulked deck,
 where strips of veneer are epoxied down to the subdeck and after varnishing the seams are filled with
white polyurethane. I used a piece of steel approximately 3/16" thick as a spacer between the pieces. From the beginning I knew that it would be important visually to keep the seams aligned from the front to back of the boat. I attached them long and then trimmed everything to the cockpit and hatch openings. I rolled two coats of epoxy on the deck so I would have a nice flat surface to start the varnishing process. A total of ten coats went on and I color sanded and buffed out the final coats with 3M Finessit to get a very smooth and glossy finish.
where strips of veneer are epoxied down to the subdeck and after varnishing the seams are filled with
white polyurethane. I used a piece of steel approximately 3/16" thick as a spacer between the pieces. From the beginning I knew that it would be important visually to keep the seams aligned from the front to back of the boat. I attached them long and then trimmed everything to the cockpit and hatch openings. I rolled two coats of epoxy on the deck so I would have a nice flat surface to start the varnishing process. A total of ten coats went on and I color sanded and buffed out the final coats with 3M Finessit to get a very smooth and glossy finish.
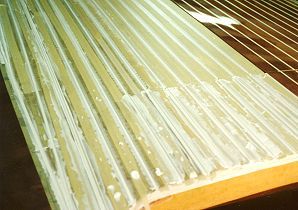
I used a V block to clean up the edges of the strips on the deck and masked off everything except the grooves. The tape I used along the groove edges was 3M Fine Line tape which is plastic and gives a very clean edge. Regular crepe masking tape was used to protect the balance of the finished wood. Sikaflex has a polyurethane product for this application but at over $10 per cartridge I decided to go to the hardware store and used a white exterior polyurethane for window and door edges that is rated for 50 years (good enough for me). Using a caulking gun I filled the grooves and smoothed them with a plastic spoon so the compound is just below the top surface of the deck It turned out pretty well overall but polyurethane compounds like this take a week to fully cure and they remain tacky for about a day. I have a few spots where air was trapped beneath the compound and once it began to set I noticed some bulges and bubbles forcing some of the compound to rise above the deck. This is something I might fix later but in the bright sunlight it is hard to notice.
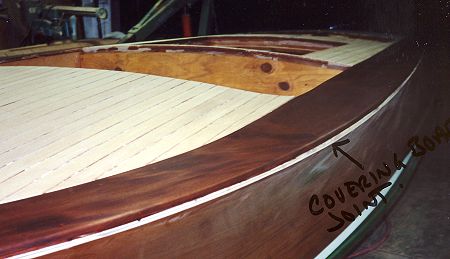
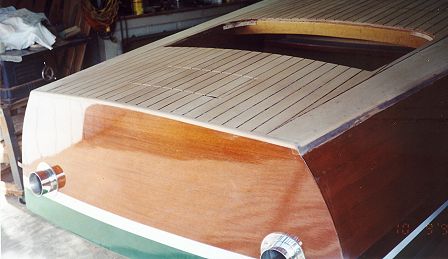
The covering boards are made up of three pieces which I stained to a uniform color that is darker than the rest of the boat but not so dark as to muddy the grain. The joints are visible in some of these pictures.
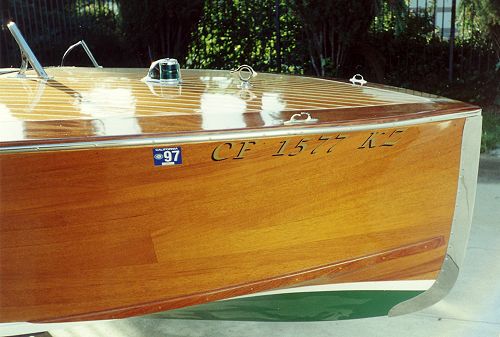
I made the cutwater and transom edging from 18 gauge stainless, which is a pain in the neck to cut but some good jigsaw blades, cutting oil and perseverance eventually paid off. I used 1/16" plywood to make templates for all pieces then cut, polished and drilled the transom edges. The cutwater was a little tricky but I started with the two pieces, which I fit (bent) to go along with the contour of the stem making sure that they met in a straight line. I taped them together and ran a weld bead on the outside to join them. I coated the outside surfaces with flux to protect them from the welding splatter. This left some grinding work and a lot of polishing but it came out fine. There was some minor fitting after welding where sections of the cutwater had to be spread open since the heat from the welding process tended to make the metal shrink (I guess).
I hope these comments and photos are of help to other builders.