Applying a veneer deck on the Malahini
by Jeff Pierce
Do you have any comments about how you did it that you would like to include with the photos?
I assume your question refers to the decks, which are 1/4" planks applied to the 1/4" plywood specified in the plans. I also used very thin veneer (about 0.040") on the plywood hull, but quite frankly, my method there gave me quite a bit of trouble and is not to be recommended.
My method for the plank on ply decks was as follows:
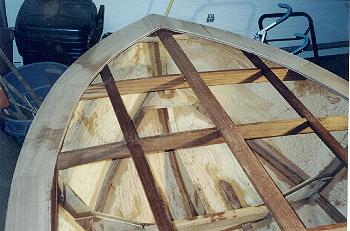
I started by first installing the covering boards, for which I used full 4/4 stock. Obviously, in this case these were not true covering boards because they don't really "cover" the decking. I routed a 1/4" high x 3/8" deep groove centered on the thickness along the inside edge of the covering boards.
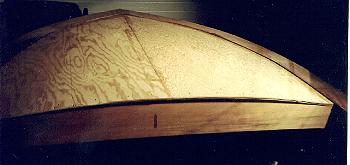
I used 1/4" spacers to raise the level of the deck framing to flush with the bottom of this routed groove. I then cut and fit the 1/4" plywood subdeck so that it fit into the routed groove.
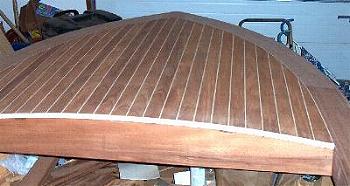
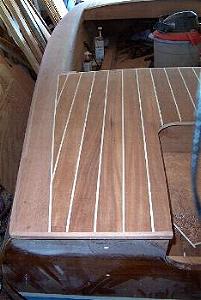
The planks are 1/4" thick by 2-1/2" wide mahogany and were spaced by contrasting strips of very white maple approximately 3/16" wide (I couldn't find any good holly stock). I clamped the planks and epoxied in place thus leaving no screw holes to bung in the planks.
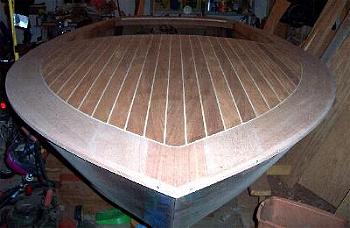
I started with the center plank and worked outward. Each successive plank was clamped from the outboard side. I made clamping blocks which were simply small blocks of wood with a 1/4" deep by 2" long step on the underside. The edge of the step was butted against the longitudinal edge of the plank so that the 2" portion overhung the plank. The clamp was then screwed to the plywood subdeck outboard of the plank, which drew the plank tight to the plywood. This clamping scheme only allowed me to lay 2 planks at a time, one port and one stbd, then I had to wait for the epoxy to cure. It was quite slow, but it worked. Incidently, I should note that a wax paper barrier has to be placed between the clamps and the plank or the excess epoxy squeeze-out will bond them to the plank.
The bit of maple trim around the inside perimeter of the covering boards had to be steamed to make the tight bend at the nose. This was done simply enough over a teakettle, being that the stock was so small.
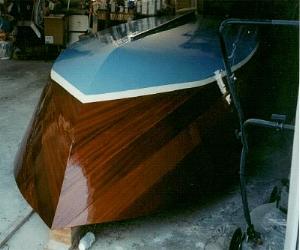
Some fairing in with a portable 3-1/4" power planer, then lots of sanding brought me to the point shown in the photos.