The trials of building the Renegade
by Mark Haxton
Continued
Note: Click on thumbnail photos below to enlarge. Use Back
button to return.
I've read every one of the news letters on the Glen-L website and have found the answers to many of my questions in its pages. I've been meaning to give you pictures and tell you how the build was coming along, but until this point, my project hadn't decided if it wanted to be a boat, or a large pile of firewood. My project looks like it might be a boat after all, so here we go. I'll tell you about the mistakes I made on my project if you promise not to laugh (too hard). Remember I got into this having no idea what I was doing.
When I tell my friends that I'm building a boat out of wood, I think they imagine the cartoon type with pieces of two by fours strapped together with twine and nailed together with whatever is laying around the garage. They call me Noah and ask me if my boat floats yet. I tell them that it does float (since it's made out of wood) but can't carry any passengers, unless they don't mind getting wet. Even my own wife tells me they sell pre-assembled boats at the store and wants to know why I can't just get one of those. All the skepticism just makes me to want to work harder so the thing turns out even better.
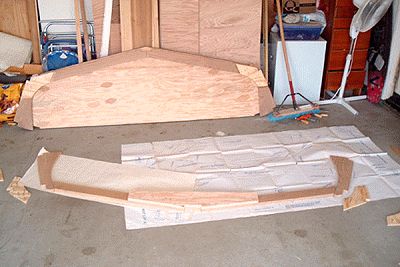
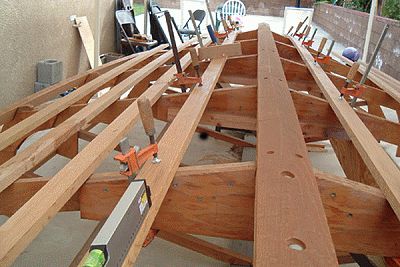
The first photograph is one of the frames laid out. I drew the image on butcher paper and taped it along the centerline to lay them out for gluing. I put wax paper over the parts I glued and set them right on top of the plans. If I could cut out the frames again, I would spend the time and cut each piece out of thin hardwood and use it as a template. I would use a router with a bit that has a bearing on it to get the frame to match the template. Instead I just drew from the plans onto the wood (I'm using White Oak) and cut both pieces at the same time with a jigsaw. Unfortunately, the blade of the jigsaw bends a little bit as I go around corners and the bottom piece was off a little bit. I had to hold both pieces together and use a sander to get the edges to match.
When I glued the frames, I discovered that the glue acts as a lubricant when wet. I put the frames down in the proper position and hammered the nails. I looked at the piece and saw that it had moved out of the proper position while hammering the first nail, and the second through fifth nails secured it in the incorrect position. Luckily I noticed this before the glue set. But I had to pull out the nails and re-cut the gusset. After that, I hammered one nail, and then made sure the frame was still in its proper position before hammering the second. One of the frames split from the nails. I should have pre-drilled the nail holes. I read about other people having the same two problems in either your newsletter, or Boat builder Connection several months later. File those under "Information I could have used YESTERDAY".
Another problem I had was in positioning the breasthook to the stem. The breasthook is made with two pieces of plywood with a notch on the lower piece. The stem fits into the notch, but I didn't know where along the notch to position it. Instead of finding out, or thinking about it, I put the stem piece all the way back into the notch. After I had the piece set up on the form, I realized that the breasthook was too far forward, and the plywood running along the stem would hit the bottom of the breast hook and not the edge. I had to cut about an inch off the sides of the breast hook and re-shape the point so the line of the stem would hit the point.
Another problem was caused by my not paying attention. The sheer clamps are in two laminations except between frame number 6 and the stem, where an extra lamination is set inside, between the frames. Even though this is clearly indicated on the instructions, I cut out a notch for the inner lamination in frame number 7. I didn't realize my error until I set the two laminations of sheer clamps in and was ready for the inner lamination. I had set the middle lamination where the inner lamination was supposed to be. Luckily it happened at a bend and not where it is supposed to be in a straight line. With about two feet between frames, I can't imagine three quarters of an inch will make much of a difference in four feet where the boat is out of the water at the sheer, but I guess I'll have to wait until I launch it to find out. I did have to cut a little bit off the edge of the frame between the sheer and the chine.
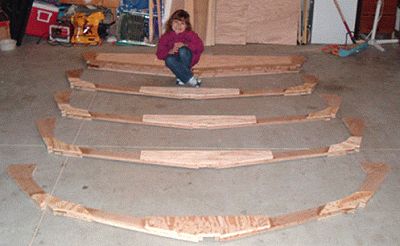
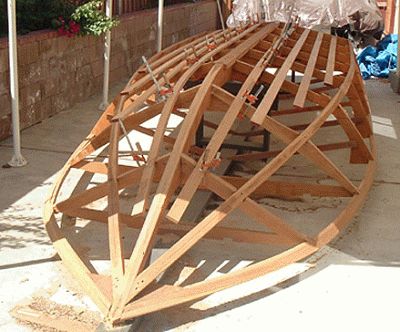
The second picture is of frames 1 - 4 and the transom laid out. The beautiful girl is my first daughter Riley.
Picture 3 is how I set up the position of the stem on the keel. I put a piece of contractors twine on the back of the keel at center. I ran the twine along the length of the keel then used a plumb bob to find out where the center of the stem should be. This picture was taken before I discovered the problem with the breast hook position. You can see how far forward the point of the breast hook is from the tip of the stem.
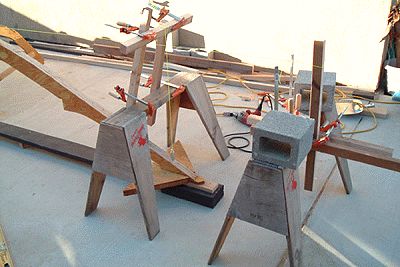
Picture 4 is of a jig I made for my hand planer used to determine the angle of the keel. This worked pretty good, but wasn't perfect and I had to fix a few areas later.
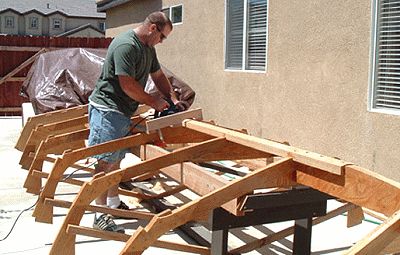
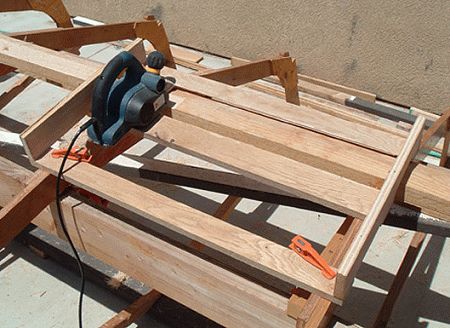
Picture 5 is of me using the planer and the jig.
Picture 6 is the initial fitting of the chine 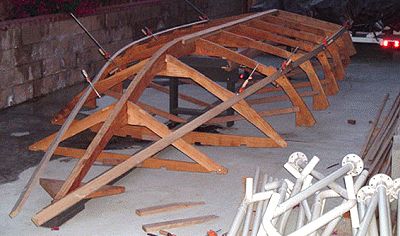 logs. I
didn't have trouble bending the chine log into place. I pushed on the chine
log with my leg and clamped it in place. I left it in the position for a few
days and it pretty much kept the bend when I removed it to prepare it for
gluing.
logs. I
didn't have trouble bending the chine log into place. I pushed on the chine
log with my leg and clamped it in place. I left it in the position for a few
days and it pretty much kept the bend when I removed it to prepare it for
gluing.
Picture 7 shows the fairing of the chine log. I used a rasp to find the proper angle at the frames. I drew a line between the frames and used the hand planer to take the wood to the lines.
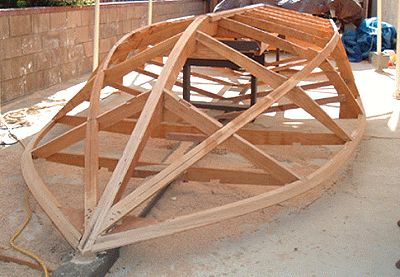
Picture 8 is the frame with most of the fairing done.
Picture 9 shows the fitting of the bottom battens.
 I know
it is recommended to wait until the side plywood is in place before putting on
the bottom battens for access reasons. However, I didn't completely trust
my fairing of the chine log and keel, so I wanted to see how they went along
with the bottom battens. The lack of access was worth my piece of mind. I put a
laser level on each batten and ran a piece of wood along the batten to see if
the laser would stay at the same height. I was happy to see that everything was
right on.
I know
it is recommended to wait until the side plywood is in place before putting on
the bottom battens for access reasons. However, I didn't completely trust
my fairing of the chine log and keel, so I wanted to see how they went along
with the bottom battens. The lack of access was worth my piece of mind. I put a
laser level on each batten and ran a piece of wood along the batten to see if
the laser would stay at the same height. I was happy to see that everything was
right on.
Picture 10 shows the bottom battens clamped and ready for gluing.
My friend who built a Glen-L boat told me, "A
proper picture of a boat being built ought to have a dog in it". In the
eleventh picture is my runt lab Sarah (Everyone thinks she is a puppy.) This 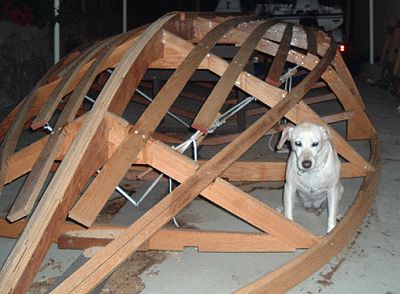 picture also shows how I kept the ends of the bottom battens
in place. I put an eye screw on the underside of each batten and on the set up
frame. With a piece of rope, I used what I think is called a Spanish windlass.
I tied the rope, twisted a stick around the rope and continued to twist it
until the battens were in place. I used one of the free ends of the rope to tie
the stick to the part of the rope that is under tension. This held the stick
and the battens in place.
picture also shows how I kept the ends of the bottom battens
in place. I put an eye screw on the underside of each batten and on the set up
frame. With a piece of rope, I used what I think is called a Spanish windlass.
I tied the rope, twisted a stick around the rope and continued to twist it
until the battens were in place. I used one of the free ends of the rope to tie
the stick to the part of the rope that is under tension. This held the stick
and the battens in place.
Now is the point where my building took an
unfortunate turn. In the early months of 2005 we in California had
record-breaking rainstorms. I didn't encapsulate all of the wood because I
knew I would be exposing bare wood when I faired it (At least that is how I
rationalize it. I think I was really just too exited to put the wood on the
boat instead of spending an extra day coating it.) I didn't expect all the
rain we had, and although I covered it with a tarp (kind of), water got in and
the outer layer of sheer clamps broke free. Now look at picture 12.  I'm sorry about the angle of the shot, but I think I was
swearing even as I took the photo. That took a lot of the determination out of
me, and the boat stayed as it was for many months. I spent the whole summer
wondering if I should continue with the project, or get one of those
pre-assembled boats my wife was talking about. Then in September, I slapped
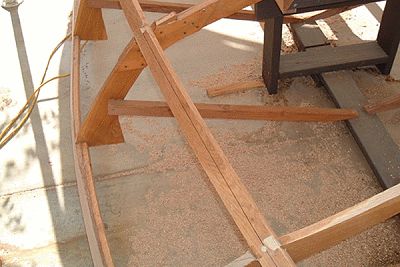
myself in the face (figuratively, not physically) and decided to fix the damage
and continue. I cut some blocks of scrap wood with a notch to re-glue the sheer
clamp (picture 13).
I'm sorry about the angle of the shot, but I think I was
swearing even as I took the photo. That took a lot of the determination out of
me, and the boat stayed as it was for many months. I spent the whole summer
wondering if I should continue with the project, or get one of those
pre-assembled boats my wife was talking about. Then in September, I slapped
myself in the face (figuratively, not physically) and decided to fix the damage
and continue. I cut some blocks of scrap wood with a notch to re-glue the sheer
clamp (picture 13). 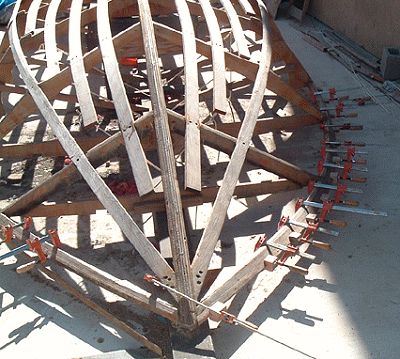 This time I added screws to make sure they held. This worked
on the starboard side. On the port side, I noticed a hard spot at one of the
frames. I tore out the entire port sheer clamp and re-did it. Since then,
I've been hard-charging the project. I finished the fairing and started
skinning the thing.
This time I added screws to make sure they held. This worked
on the starboard side. On the port side, I noticed a hard spot at one of the
frames. I tore out the entire port sheer clamp and re-did it. Since then,
I've been hard-charging the project. I finished the fairing and started
skinning the thing.
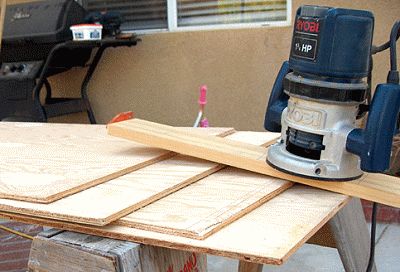
In picture 14, I show how I scarf-joined the
plywood. I used a blocking piece of wood on the top and bottom at a distance I
figured was a 1:10 ratio for the thickness of the plywood. I bolted a piece of
wood to the bottom of my router and went for it. On this try, I did two panels
at the same time. The rest I did one at a time. I was covered in sawdust and 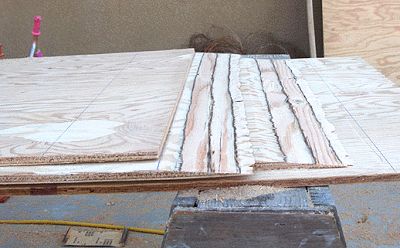 was coughing the rest of the night. The next day, I bought
one of those cool masks with the filters. Picture 15 shows the pieces cut.
was coughing the rest of the night. The next day, I bought
one of those cool masks with the filters. Picture 15 shows the pieces cut.
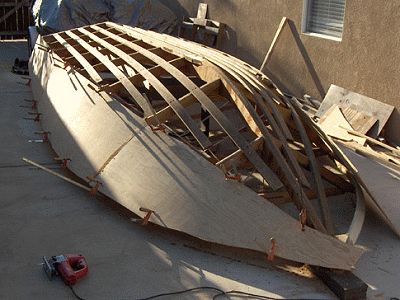
Picture 16 shows the boat with the side planking rough-cut and in position.
For the bottom planking, the plans call for
one-half inch plywood for the aft, and two layers of quarter inch for the front
to ease bending. I planned on gluing the one-half inch pieces in place,  then cut and fit the quarter inch pieces. On the half inch
pieces, I used the router and cut one-quarter inch for six inches from the
edge. I figure this will stagger the location of the joint for the two layers
of quarter inch plywood and act as a butt block for the first layer. I think
I'll still put another piece under the first layer at the joint to make
sure it is secure. Picture seventeen shows the joint. The half inch piece is
already glued in place and the quarter inch piece has not been cut yet.
then cut and fit the quarter inch pieces. On the half inch
pieces, I used the router and cut one-quarter inch for six inches from the
edge. I figure this will stagger the location of the joint for the two layers
of quarter inch plywood and act as a butt block for the first layer. I think
I'll still put another piece under the first layer at the joint to make
sure it is secure. Picture seventeen shows the joint. The half inch piece is
already glued in place and the quarter inch piece has not been cut yet.
The eighteenth picture shows how the boat is at 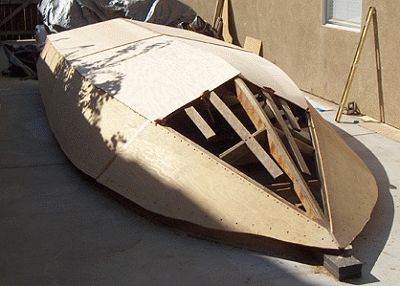 the time I write this. I've rough cut the triangles that
will fit to the pieces clamped down. I'll try a scarf-joint again and
attach the first layer of quarter inch plywood. Then I'll finally have a
boat that can float, and not only because of the buoyancy of wood. Of course
I'm taking much better care to completely cover the boat with a tarp until
I completely encapsulate and paint it.
the time I write this. I've rough cut the triangles that
will fit to the pieces clamped down. I'll try a scarf-joint again and
attach the first layer of quarter inch plywood. Then I'll finally have a
boat that can float, and not only because of the buoyancy of wood. Of course
I'm taking much better care to completely cover the boat with a tarp until
I completely encapsulate and paint it.
I would like to throw a quick disclaimer to those out of state (or country) who may read this and wonder "what kind of idiot would leave a partially finished, exposed wood boat project under a haphazardly placed tarp during the winter?" And say, "Those Southern Californians don't know anything about 'real' rain." Well, I've lived in Southern California all my life, and no we don't know anything about 'real' rain. And yes I am just the kind of idiot who would leave a partially finished, exposed wood boat project under a haphazardly placed tarp during the winter.
One big problem I've had with the project is
the galvanized screw set I bought from Glen-L. I believe I read in one of the
newsletters that Glen-L will no longer sell the galvanized screw kits. This is
good because those darn screws caused me to swear more than the sheer clamp
breaking incident did. I think more of the screws stripped or had heads break
off than actually made it in the boat. I started by using a screw and
countersink set. I used the corresponding piece for the width of the screw. If
the screw was a number 8, I used the number 8 drill and countersink. As for the
depth, I looked in the boat building book and it recommended going in to half
the distance of the threads. When I did this, every screw stripped before
getting all the way down. I had to pull a lot of screws out with channel lock
pliers, and a stripped screw removed I bought. My boat-building friend told me
I should drill the holes bigger because White Oak is a hard wood. I drilled the
holes wider and deeper (the whole length of the screw) and the majority  still stripped. On picture 19 I show an example of the screw
and the drill bit I used. I drilled the entire length of the screw. On picture
20 I show four screws I tried to put in. Only one of the screws made it, and
the rest stripped and stopped where they are. I had to pull them out with
pliers. I
still stripped. On picture 19 I show an example of the screw
and the drill bit I used. I drilled the entire length of the screw. On picture
20 I show four screws I tried to put in. Only one of the screws made it, and
the rest stripped and stopped where they are. I had to pull them out with
pliers. I  threw the rest of the galvanized screws away and bought
stainless steel screws with Teflon coating from Lowes. I'm not sure if
these are proper for a boat, but the box says they are intended for outside use
near the ocean, and I'm going to encapsulate the boat. Also I'm not
likely going to put it in salt water.
threw the rest of the galvanized screws away and bought
stainless steel screws with Teflon coating from Lowes. I'm not sure if
these are proper for a boat, but the box says they are intended for outside use
near the ocean, and I'm going to encapsulate the boat. Also I'm not
likely going to put it in salt water.
So far this has been a great experience. I say 'so far' because I haven't put the thing in water yet. If the boat doesn't float, I don't think I'll be saying I had a great experience spending so much time making an artificial reef for the fish at the bottom of a lake. Although I'm optimistic that won't happen.
I'll send more photographs and keep you updated as I progress with the boat.
Continued in WebLetter 76.