Cruisette: Builders' Diary, Part 3
Ron & Devy Porter
Continued
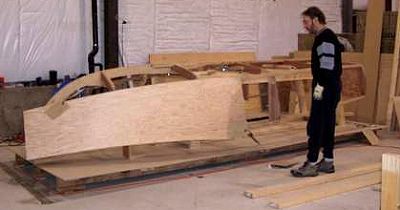
Here, Devy caught me trying to decide whether we had a good position on the bow sheet. I felt pretty good about it, so I marked the lines and cut.
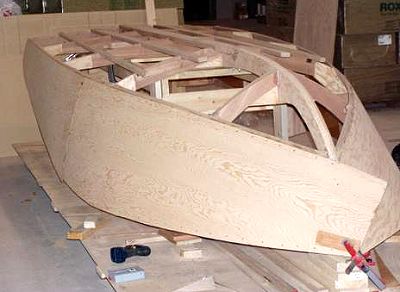
So, with the bow piece cut, we clamped both the panels into place for a quick look at how things will go together. There is still a bit of trimming to be done where the two sheets meet, and we'll also have to put a backing piece in place to stabilize the joint. There is also a bit of trimming to do at the stem (the extreme forward end, to the left in this shot) to finish up the final shape. That will be done after the sheet is permanently affixed.
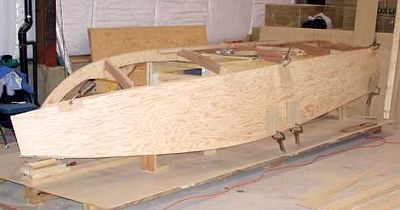
And here is a view from the bow. I was surprised at how easily the plywood took the curves, but I guess that's all part of the designer's job. Everything I've read suggests that the bottom sheet at the bow end will be a bit trickier. I wouldn't be surprised--not only is there a kind of nasty curve (actually a compound curve!), but the bottom plywood is 3/8 inch instead of the 1/4 inch used on the sides. After we took this shot, we unclamped and transferred the sheets over to the other side to test fit them there. Lo and behold, they fit, so we were able to simply use them as templates to cut the other side.
Days 14-16 ( Jan 15, 2006): The sides of the hull are completely sheeted!
We went out Friday evening (the first time we've done so) and coated the inside of the side sheets with epoxy to get them ready for installation on Saturday and Sunday.
Then on Saturday we got starboard side sheeted in. There were a few minor challenges, mostly related to the bow area and getting the curve in place. In the end, it turned out fine. However, the need for a clamp at the bow prevented us from continuing with the port side. Oh well, there's always another day.
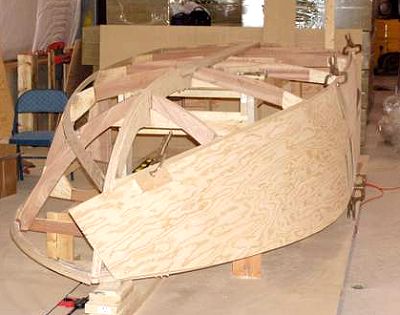
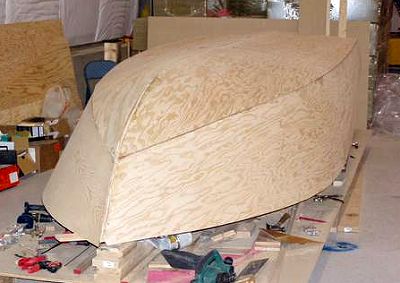
Today (Sunday) we got the port side on. This side went on much easier than the starboard side. I suspect that the major factor is practice. We used the starboard side to learn how to cut the sheets, so we did a better job on the port. We also used the starboard side to learn how to put everything together, so we did a better job on the port. Anyway, here's what the port side looks like.
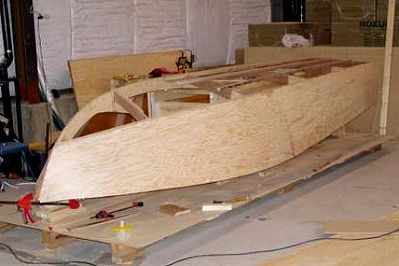
And finally, here's another shot of the starboard after the port sheeting is in place. One thing that I found quite interesting was that the battens didn't interfere at all with the installation of the side sheeting. Everything I've read says that the side sheeting can be installed much easier if you leave batten installation until after the sheeting is complete. We had notched the frames for the battens and laid them in place just to get a sense of how things go together, but he didn't fasten them down. We might as well have fastened them into place, because they weren't in the way at all.
Days 17 and 18 ( Jan 22, 2006): The bottom of the hull is nearly sheeted in! At the expense of a drill.
The bow was a bit of a challenge. We fought with it for quite a while on Saturday before it became obvious that we had both cut away wood that we knew was safe to remove and work with strategically placed wet rags. We knew all along that we were going to need to do the hydrating thing, but we didn't expect it to be as critical to success as it turned out to be. I was also surprised at just how much easier things went once we let the wet rags sit for a few hours.
Wow!! Are there ever a lot of screws to install! In fact, there were so many that we killed both batteries for our cordless drills then switched over to our backup (a corded drill) and burnt the motor out. That wasn't a big deal, because that drill was a gift from Devy's dad in the early days of our marriage. I'm guessing that it was 25 years old, so it doesn't owe us anything. Anyway, we took that as an excuse to go out for lunch and tool shopping. If it wasn't for that little glitch, we would probably would have finished the port side too, so things actually went quite well. Our choice was between a couple of spare batteries and a new corded drill, both options in the same price range. We elected to go with the spare batteries. Well, I opted to go with the spare batteries, because I hate cords. Besides, we have two matching cordless drills, so as long as we have battery power, two of us can work at the same time.
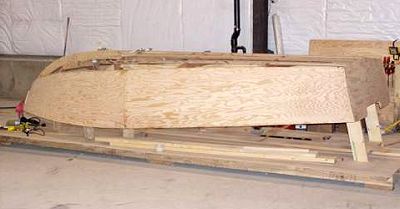
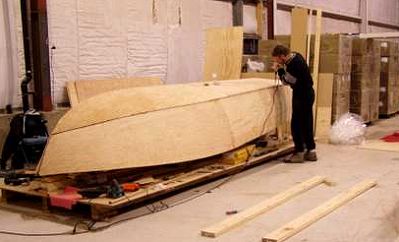
So, here's what the starboard side looks like. There is still some finish work to be done along the chines (where bottom meets side) and along the keel and bow. And there are way too many screws to putty over.
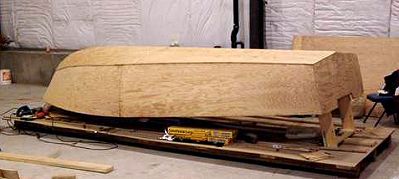
Here's another shot of the starboard side from an aft position. When we started this, one of the things that I was hoping for was to get a nice enough job on the sheeting to actually have the option to leave it unpainted. So far, we're on track to achieve that level of finish, assuming that standards are not kept too high. There are a few spots where the screw spacing is off because somebody got over zealous with the counter sinking and there are a couple of spots where the line of the screws is crooked because somebody misjudged the position of the battens. However, if the bottom sheeting on the port side comes out as nicely as this, then the only fairing (think body filler) will be in places that are only visible if you crawl (or dive!) under the boat. In any case, the final decision to paint or not will be made only after the hull is faired and fiberglassed.
Days 19 and 20 ( Feb 1, 2006): Sheeting of the hull is 100% complete!
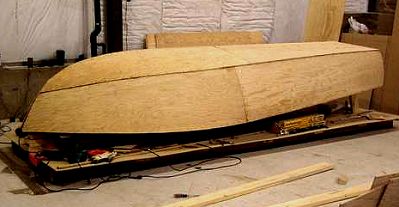
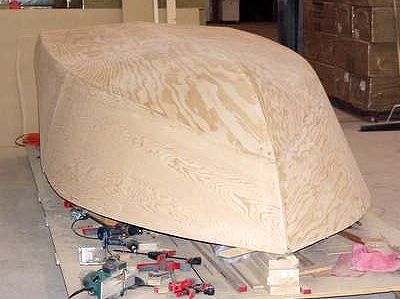
Let the bells ring out and the banners fly! We've finished sheeting in the hull. We finished off the starboard side last weekend and this weekend we finished off the port side. It actually looks like it will float! (Well, duh, it's wood, right?) Anyway, the starboard presented its own trials and tribulations, but the port side was just plain nasty. On the plus side, we had everything precise enough that we were able to use the starboard sheets as a template for cutting the port sheets. On the downside, I did something wrong, either when we were getting things lined up and setting up the alignment screws or during the actual installation. It quickly became apparent that the port sheet was going to overlap the starboard sheet at the stern, starting about 2 feet from the transom and to a maximum extent of nearly an inch. In a race against time--the epoxy has a working life of only 30-40 minutes--we pulled a few screws, did some realignment and charged back in. I tried to stay relaxed so as to avoid making things worse and I kept a close eye on the epoxy in case we had to quit, scrape everything off, and start over. In the end, we got the panel in place just fine, although even with 4 fresh batteries, I still had to use the backup corded drill for the last dozen screws. I guess the motor isn't actually burnt out as I thought last week, but it's definitely never going to be the same. And I guess we should probably invest in a new backup drill!
When we were getting started on Saturday, the Plant Manager told me that we had to move from this spot to another location within the warehouse by Monday at 8 am. On Sunday, after giving things overnight to cure, I went back in and cleaned up the rough edges and then did a preliminary inspection of everything, looking for humps, hollows, and other imperfections. I checked measurements. I checked horizontal and vertical alignments as well as verifying that things are still level and plumb. I got out my 8-foot straightedge and looked for large areas that might need filling. The verdict: pretty darn good!
Then I set out to move everything. I didn't anticipate any problems now that the hull is fully sheeted and everything worked out fine. Since we had anticipated this possibility, we had done all of our set up on a 16-foot pallet that we made more stable with appropriately located lumber. I put a pallet jack under the stern end and a hand wheeler under the bow and zipped it right over. Then I gave things another fairly detailed inspection and couldn't find any evidence of shifting or twisting. In the end, the only spots besides screw heads that needed filling or filing were at the actual butt joints on the panels (16-foot plywood is too expensive, and scarf joints weren't deemed necessary). Those joints came out so well that there was very little sanding required and just a small amount of filler.
There actually is a slight dip across the entire bottom extending about 4 inches forward from the transom. In fact, this looks like it might make our life easier when it comes to truing up that region as part of sheathing the hull with fiberglass. Fiberglass doesn't work very well on sharp corners, so every corner has to be rounded. However, my Glen-L book on plywood boats (or was it the fiberglassing video?) makes it quite clear that the corner where the bottom meets the hull should be 'crisp' (sharp, not rounded). To that end, the builder is expected to put a few layers of fiberglass over the corner and then grind things out to nice flat surfaces with a crisp corner. That slight dip near the transom looks like it should reduce the amount of grinding on the bottom of the hull, which doesn't hurt my feelings at all.
Next issue: Turn over