Cruisette: Builders' Diary, Part 5
Ron & Devy Porter
Continued
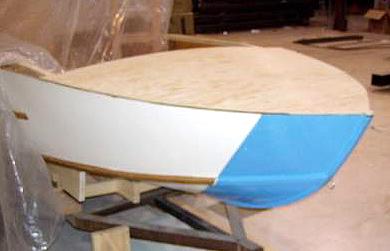
( Apr 2, 2006): Finally, some real work on the top-side.
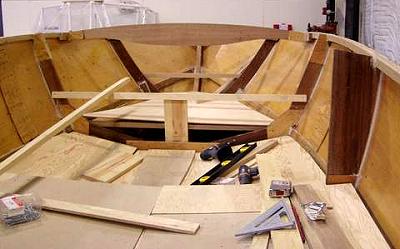
Well, I finally got some real work done up top. If you look very closely, you can see where I've moved a deck beam forward from its original position. To prevent springing during the move, there is a pine crossbar on the frame where the deck beam was originally located. Why move it you ask? Simple: the boat can be built with or without a cabin. When building without, the deck frame just stays at the original position, but to build the cabin it needs to be moved forward 15 inches. I hope nobody gets too excited over the fact that it actually ended up moving 15-1/2 inches. It was a lot tougher than I thought to get the measurements just right where the sheer (top edge) is curving in toward the bow.
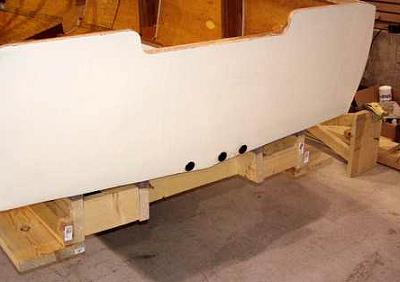
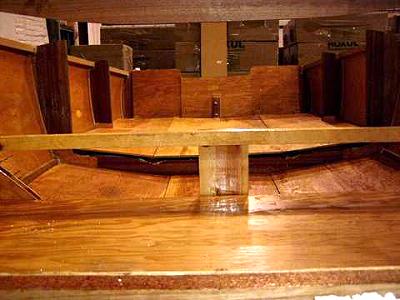
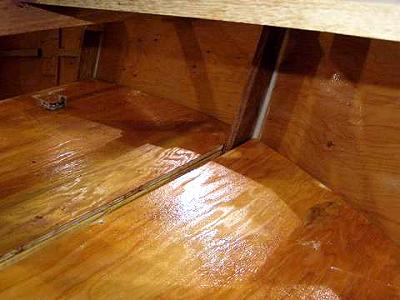
This is a lovely shot of the 3 drains I've got so far. I'll still need one for the bilge pump and one in the motor well when it's built. Actually, only the centre one is an honest-to-goodness bilge drain. The other two are the inlet and outlet for the cabin's cooling system. You may recall that we're planning to pump lake water through a transmission cooler or other radiator-like device to try and keep the cabin to a manageable temperature for Devy. Those hot days can be pretty tough to deal with at the best of times.
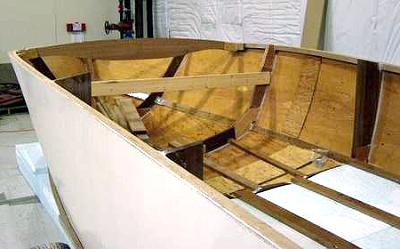
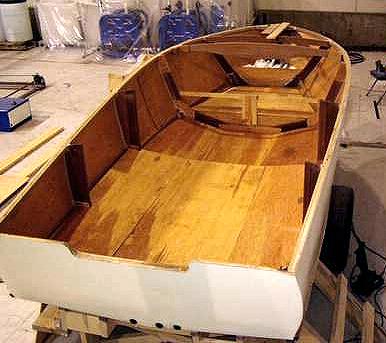
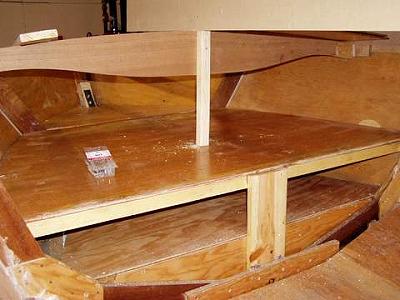
And finally, here's a shot of the cockpit floor in progress. I've got the floatation and the floor battens in place. There was some confusion over how to make all this work, because every set of instructions I've got just glosses over the flooring. A bit of reading between the lines and some comparisons between the floor and the hull led to the result you see here. Note that the floatation stops about 9 inches short of the transom for access to the drain plug and 'coolant' plumbing. If you sight along the sheer at the right side of the photo, you can see that there is still a lot of planing to do in order to get the side-decking under control. I decided to leave that until I had a floor because it's quite a reach from outside with the boat on the trailer.
Days 39 and 40 ( Apr 12, 2006): The floor was harder than I expected.
There isn't a lot to show this week. I spent all day Saturday and Sunday measuring, making sketches, thinking, measuring, cutting... I didn't think I'd ever get it figured out. The cockpit floor (foreground and covered with junk) was trivial. The main cabin floor was reasonably straight forward. But the floor under the forward part of the berth was brutal. First of all, it's not so much a floor as one component in a system. I suppose that it might not be technically necessary to even put a floor under any part of the berth, but I want some easy-to-use storage, even if it means giving up a bit of space. That means making the floor reasonably flat and level and that close to the bow the hull is far from flat and level.
Of course the biggest problem stems from the fact that there is any usable space at all! You see, the plans call for just a sleeping platform in the cabin. If Devy--or anybody--is actually going to spend time in the cabin whether underway or not, then it's important to provide actually seating. I've been struggling for some time with the idea that the berth is shown as only 3 inches or so above the hull at the keel. That's not really comfortable seating. I've done quite a few sketches that lead me to believe I can add nearly 10 inches to the height of the cabin without being horribly ugly. Yes, things have to be reshaped a bit and the cabin roof might end up as a plain roof instead of having both a ceiling and a roof, but I now have things organized for semi-comfortable short-term seating instead of having just a sleeping platform. I've actually been kicking around the idea of making it a 'pop top'; a roof that raises and lowers. Although I know in principle how to keep such a thing waterproof, I feel that I really should get more comfortable with wood as a construction material before I start trying to pull off funky stuff like that.
It was quite a lot of work to get all the details worked out, but I think it'll all come out fine. Even though the floor under the forward part of the berth seems to have a lot of wasted space under it, there is actually more storage than the original drawings allowed for. Skis, wakeboards, fishing gear, and more will all fit out of the way and out of sight. And that wasted space will be packed with foam, thus adding to the buoyancy should I get stupid enough to hole the boat.
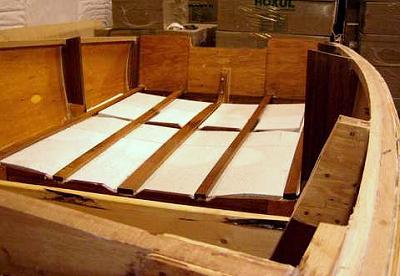
Days 41-43 ( Apr 16, 2006): The floor is complete
I got the floor in and some basic framing for the berth. It was a pretty challenging weekend, between trying to get the floorboards epoxied, the floatation and flooring installed and the bow-eye installed (oops! no photo!). Anyway, the two big jobs were getting the floatation into the oddly shaped spaces available under the flooring and getting the bow-eye in.
The bow-eye took 4 hours from start to finish! Nobody locally can supply one with long enough bolts to get all the way through the stem. No big deal, right? Just drill the hole a bit bigger and use a coupler nut and some threaded stock to extend as necessary. Not likely! I'm not sure what kind of equipment was used to manufacture the bolts on the eye, but nobody could match either the thread or the size. 5/16 " was too small, 3/8" was too big, and the metric sizes didn't work either. Just fishing a nut down and using an extension socket wasn't really an option because I'm not really keen on depending on the holding power of an unwashered nut in this situation. In the end, I just went out and bought a standard u-bolt and then used a coupler nut and some threaded stock to extend the reach. It's not as attractive, but at least I know it'll stand up to the intended use.
Days 44-47 ( May 17, 2006): The topsides are starting to come together.
This is what I managed to get done on Sunday afternoon.
The berth. Here's my pride and joy: I got a pretty much perfect fit along the inside of the hull. It took a couple of tries with some scrap MDF to get a template cut, but the results were worth it. As you can see, there is some storage under this part of the berth.
...and the part of the berth that fits in the very front worked out okay, too. I've packed floatation foam under this part of the berth.
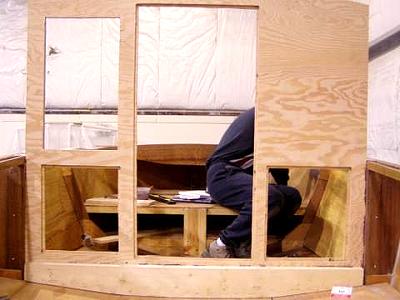
Here's the main cabin wall, complete with routered cutouts for the entry door, a window, and a couple of access doorways to what will be storage under the seating part of the berth (not yet constructed). The attentive will notice that the access doorways are just a bit taller than makes sense--oh well, I did a great job on the berth (so far) and screwed up the measurements here. I never realized the problem until after I had everything epoxied in place, so I guess I either leave them and put large doors or find a way to close in the top half of those holes. Either way, you'll get pictures.
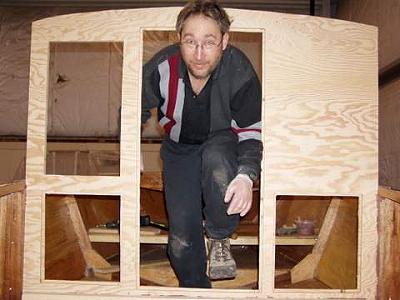
Yup, the doorway works!
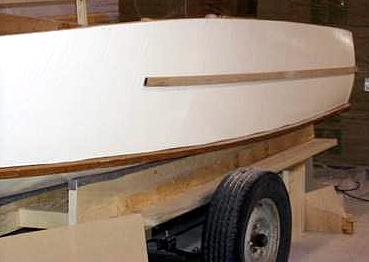
And here is the front deck. It's not a great photo, because I was in a hurry to make it for a Mother's Day supper. But the deck fits!