Glen-L Tunnel Mite by Donnie Gilliland
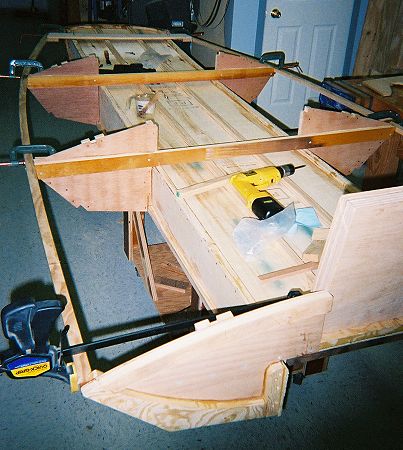
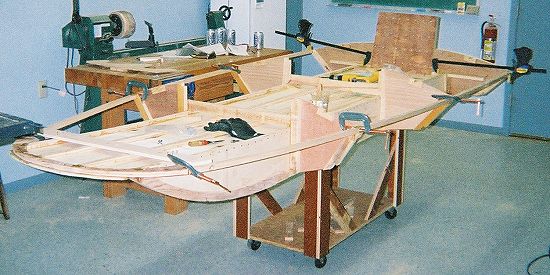
The first couple of pics are the Tunnel Mite during the frame construction and assembly on the building jig. I had lots of help from my brother; without him, the bending of the sheers and chines would not have happened. I soaked them in the swimming pool for a day before trying to bend them. Wait until the frames are made and assembled on the jig before cutting the chine and sheer notches in frame 2; reason being that the angle and curvature cannot be guessed upon and cut. (lesson #1) I used Glen L fasteners, epoxy, 'glass and filler materials throughout and highly advise others to do so.
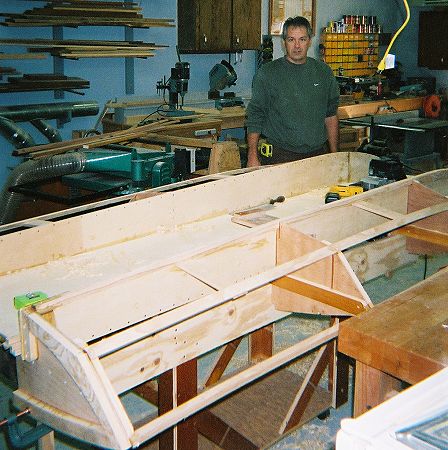
Bottom and side planking installed. By this point, you should have planned for all the necessary electrical, fuel, gauges, wiring, etc to fit through the available spaces; it's very difficult, if not impossible after. Starting to look like a boat!
This shot shows that I raised the dash height by 3 inches; it just seemed to fit and look better that way. I had read in the photo archives where others had also done this on other designs without complications. Also note that I did not encapsulate the planking and frame members during the process; big mistake; it's MUCH easier during the constructing than after, there are just too many nooks and crannies to get at; you'll miss many.
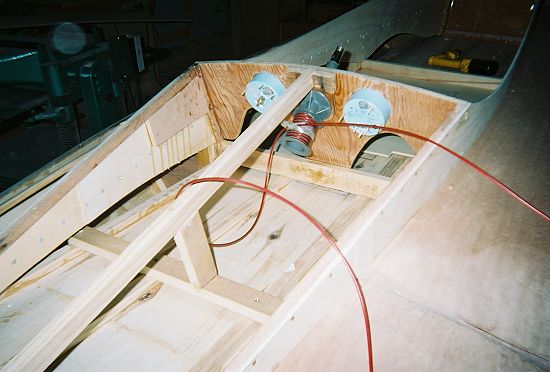
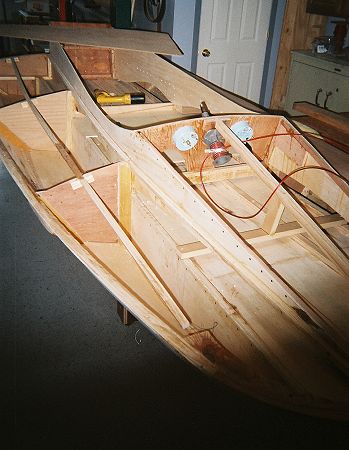
Pour-in floatation and top sheathing installed. I found the sheathing process something to take your time at to get the pieces to fit along the coaming correctly. I used the back side of a plastic spoon and Poxy-Shield thickened with microballons to get a nice looking radius along the coaming/side decking joint. Also, make absolutely sure to properly countersink all nail and screw heads at this time, it's easier to fill the dimples with thickened epoxy than to try and grind off the heads and hope they don't show. (Trust me on this one…) Here I installed blocking for the coaming pulleys and additional bracing for the strongback. The gauges and steering are fitted. I decided to stay with the exposed cable steering system as it's what's specified in the Glen L plans, and, I salvaged it from an abandoned boat that washed up on the beach here on the Mississippi River.

Fiberglass installed, sanded and working on the wet sanding. I would recommend that you purchase a good rubber sanding block and 3M wet/dry paper for this part. (lesson #2) I was a little nervous about laying down the 'glass at first but after reading Glen L's book, "How To Fiberglass Boats", it made much more sense and went easy.
Primered, final wet sand with 600 grit and heading to the paint shop. (lesson #3) Don't kid yourself here, wet sanding takes lots of elbow grease and patience, but here is where all the hard work pays off in the final product. Take your time.