On the Mark: Improvements - Wakeboard Pylon
Continued...
Design goals
- Removable pylon with quick installation and removal
- Unobtrusive when removed - Look like a classic boat with pylon off. No extra hardware should show.
- Retain engine access for maintenance and repair - Pylon mounts directly in front of the engine and above the fins.
- 7 foot high pull point above the water - We wanted to get big air.
- Rigid mounting able to withstand forces of large wakeboarder (me). This includes both starts (rearward force) and lateral force when we cut out to the side of the boat.
Construction
The pylon mounts through the deck between the engine hatch and middle seat. This area is not very wide and with the forces that are applied, I wanted to be sure that the deck would not deflect and possibly crack. Additionally, the bottom mounting point needs to be very rigid. With the long lever arm and the deck opening acting as a pivot point, there are several hundred pounds of force applied to the lower mount.
When I built the deck framing, a large box beam was included in the construction. It is approximately 5 inches tall (height of raised deck beams) by 6 inches wide. In the right hand photo, the lowest piece is the deck frame at the back of the cockpit. The idle piece is the frame for the hatch opening.
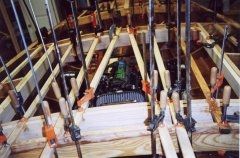 This is a view of the deck framing, looking back from the middle seat over the engine. |
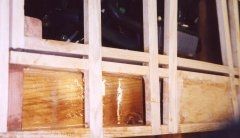 This is a close-up of the front part of the engine hatch framing. The shiny piece of wood is the bottom of the box beam. The piece at the lower right is the reinforcement of the center of the top of the beam. The deck forms the top of the box beam. |
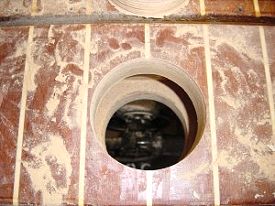 The opening for the pylon was cut with a hole saw. |
|
Looking down through the opening, you can see the thickness of the reinforced deck as well as the bottom of the beam. The inside of the box was not coated with epoxy. This area needs to either be coated (not really possible at this point) or sealed off. I chose to seal it off with a fiberglass tube.
The pylon fits into a piece of schedule 80 PVC pipe. This makes alignment with the lower mounting bracket easy. The PVC pipe was used as a mold form for the fiberglass tube. The tube was made with some scrap 4 oz cloth. It is 2 layers thick. The left photo shows the tube wrapped with paper and wax paper. The wax paper acts as a release agent. The paper acts as a spacer that will allow the PVC pipe to slide in and out of the fiberglass tube easily. The tube was epoxied into the deck opening. This provides a watertight seal for the interior of the box beam.
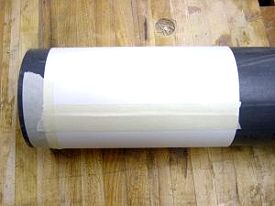 Wax paper on pipe |
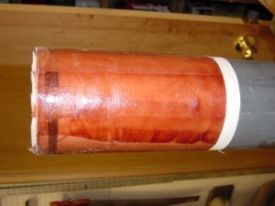 The cured tube on the pipe |
 The tube itself, off of the form. |
|
Lower mounting brackets
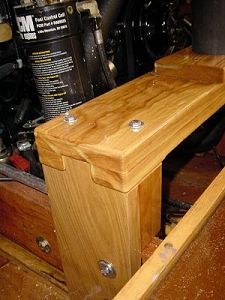
The lower mounting bracket takes a lot of stress from the pylon. The bracket pieces are probably overbuilt, as I wanted to avoid having the pylon break free and smash into the front of the engine or the back of the middle seat. The mounting bracket was made in three major sections. The right and left uprights are mounted onto the stringers and bolted to the stringer via the same bolts that mount the stringer to the frame. The original bolts were extended with long hex nuts that are commonly used for joining secions of "all-thread" rod.
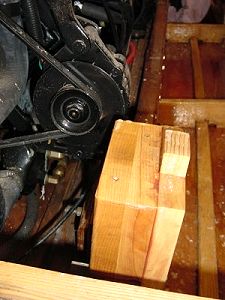
The uprights also have a block added that supports the cross piece and rests on top of the stringer. The photo to the right shows the port side bracket mounted on top of the stringer. The bracket is 6" wide and is made form 4/4 ash stock. The three layers are glued together with epoxy and the whole thing is encapsulated. The tenon on top centers the cross piece and takes up the majority of the sheer force. The two holes in the top are for the cross piece mounting bolts.
Cross Piece
The cross piece holds the lower end of the pylon and the PVC pipe. The cross piece is laminated from more pieces of ash. The top-most piece is drilled to accept the PVC pipe. There is also a 3/8" drain hole through the bottom. The photo to the left shows the mounting onto the stringer a bit more clearly.
 Starboard side mounting bracket |
 Port side mouting bracket showing top tenon |
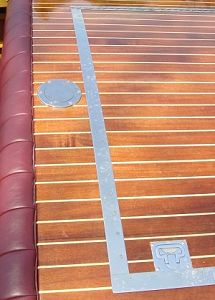
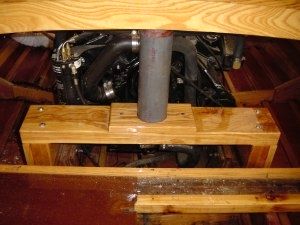 Completed pylon mount |
|
Completed
The opening is finished off with a removable stainless deck plate.
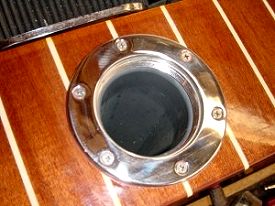 Deck plate opening |
 Deck plate cover in place |
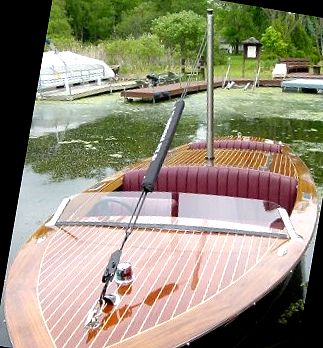 Pylon ready for use |
|
In Use
The pylon is a great improvement. We get more air and now we can consistently clear the wake. It is easier to start due to the upward pull. It is quicker and easier to get the line to the boarder in the water when circling with the boat.
We also added "Side Sacks" which provide 500lbs of water ballast and increase the wake size. This is very nice when we are lightly loaded as we often only have 2 or 3 people in the boat. Wakeboarding is a social event; more people in the boat make for more fun as well as a larger wake. The Side Sacks are another Barefoot International product. They were chosen due to thier relatively narrow shape and do not substantially interfere with board and ski storage.
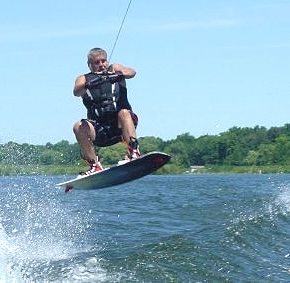
Here I am, coming in for a landing on the far side of the wake.
For the Fourth of July we used the pylon as an
oversized flag pole. The bow light has a socket for a little flag, but we never
got one to stay in reliably. The pylon worked out very well with a  full size flag.
We got a lot of favorable comments from other boaters. Our boat certainly had the largest flag on the lake that weekend.
Water pump impeller replacement
Even though the pylon mounting pieces are removable, I thought it would be prudent to replace the water pump impeller prior to installing the bracket. Last season the pump did not always easily prime and I suspected some damage and had ordered a replacement. The PCM engines use a crankshaft mounted raw water pump. When I pulled the front cover off, the impeller blades looked fine as far as I could see in. No visible damage, but I figured I would go ahead with the replacement anyway. Once I pulled the impeller out (which was a bit of a struggle), I found that the rear halves of a number of the fins were missing! No wonder it did not always prime and start drawing water nicely. It was a good thing it was replaced.
Next month
Stripping and refinishing.
We are very pleased to have Mark sharing his expertise with his fellow boat builders. If you would like to comment on this article to Mark, he can be reached at "builders at bronkalla.com". Replace the at with @. (Just trying to dodge a few spammers). See Mark's great web site for information about his Riviera project.