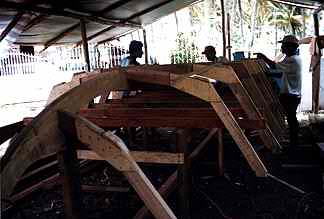
Photo three - The stem and frames have been constructed and fixed into their proper positions on the building form.
Photo four - A closer view of the frames. Note the longer pieces of
scrap wood used to position the frames on the building form. The centerline of
the keel and the positioning of the frames is carefully maintained with the
string line running down the centerline of the boat. A plywood template made
from the plans and used to build the stem can be seen hanging in the background
along with gusset templates. After careful alignment of the frames, the
longitudinals are attached and the frames are faired. Careful attention to
fairing at this point will make the sides go on easier and will ensure a better
"fit" between frame and plywood. The tendency is to rush this step
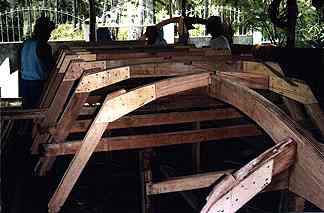 because you are anxious to get the
sideplanking on the boat and see what its going to look like. The next step is
to attach the side planking.
because you are anxious to get the
sideplanking on the boat and see what its going to look like. The next step is
to attach the side planking.
Photo five- the plywood side panels can be butt joined together and
temporarily held in place and with several pairs of hands (or many clamps) and
roughly cut to fit the boat. Be sure to leave a little excess on all sides of
the plywood. This can easily be trimmed off later for a good fit. At this
point, its good to remember that old saying "Measure twice-cut once".
As you curve the plywood panels around the hull of the boat, remember you are
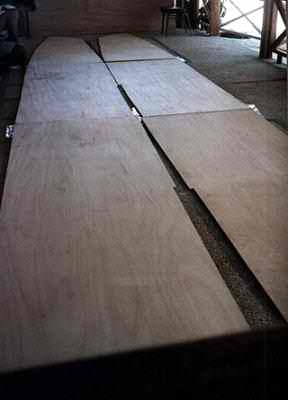 changing a two-dimensional object into
a three-dimensional object and it tends to play tricks on your mind. If you are
not careful here you may find yourself making another trip to the lumberyard
for more plywood!
changing a two-dimensional object into
a three-dimensional object and it tends to play tricks on your mind. If you are
not careful here you may find yourself making another trip to the lumberyard
for more plywood!