
A place to share YOUR boat building story
Glen-L Marine Designs - 9152 Rosecrans Ave. - Bellflower, CA 90706

In this issue
- Feedback: Eight Ball by Brian Amato
- Another gloomy Saturday by Bob
- "Journal of the Molly B" by Tom Schmidt
- Designer's Notebook: Did you ever make a mistake?
- The History of Budlight by Lloyd Corliss
- Inboard Hardware: Automobile Motors to Marine Use
- Launchings WoodenBoat magazine's photo section
- Feedback: Tango by Ed Vernon
- Recent email
GLEN-L Update
- I had already posted this WebLetter when I realized I didn't say anything about the new book titles we have. There are two books about Chris-Craft, with lots of photos that will inspire. There is also a book about wooden boat restoration and one about renovation. These last two are on a subject about which we get a lot of questions. See our Online Store for details. Books are always a good Christmas gift...
- Even though "real" email has slowed down (not SPAM), we have still had a lot of new photos added to the Customer Photos section of the website. There are usually several new photos added weekly, to be sure to check out your favorite design often.
- Does anyone have any comments about when we publish the WebLetter? In the past, I posted it on a Friday, to give our readers the weekend to read it. This has been changed to Monday at the request of the Marketing department; because that's when we have the most visitors. Comments welcome.
- We just reprinted our Boatbuilding Supplies brochure. In the past we have pasted the copy and sent a big package of printed pages and separate photos. For the first time, we emailed electronic copy with photos to the printer. We scanned the photos and shot new ones and had no idea how it would come out. Well, I think the photos are better than the last printing... but I may be biased.
- The next issue of the WebLetter will be the last of the year. If any of you have words of encouragement for your fellow builders, stories of building your boat or anything Christmasy, we welcome your contributions.
- We at Glen-L.com wish all of you a happy Thanksgiving and the joy of family and friends.
젨젨젨
Editor젨젨젨
Feedback: Eight Ball
by Brian Amato
It's been about two years since I last wrote with a project update on my 8-Ball, so I guess it's time.
In my last letter I mentioned I had first built a sailing version of 8-Ball back in the seventies and it turned out GREAT! I towed it behind more than one sailboat all over the Great Lakes up into Canada. I used it as a tender, hauling people and gear to and from the boat for years. I sailed it every chance I got and used to amaze the folks sitting in their cockpits having cocktails when I'd reach out, push the boom out perpendicular to the beam, catch the breeze straight on the bow and BACK IN to my slip alongside my Pearson-26!!
I used that boat until I used it up! And, by the way, don't let anybody tell you you can't still build a boat out of nothing more than good old Weldwood brown powder wood glue mixed with cold water to the consistency of syrup! That's all that old boat was built with, NO epoxy (was there epoxy in 1972?) and sat outside year in and year out 'til I got rid of her in 1985.
Two years ago I decided I wanted another 8-Ball, so
I bought another set of plans from you folks and set to work building TWO at a
time... one for me and one for my wife. After all... if you have to cut out a
center board trunk, why not cut out two at the same time? The first one, named
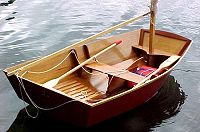 after
my wife "Teresa Ann" took to the water two summers ago (2003), less
the sailing rig and was every bit the great little "leaf on the
water" dingy I had remembered. Teresa and I had a ball rowing her around
the boats near our mooring, exploring nooks and crannies, and teaching kids the
fine art of getting somewhere on the water via oars. But I wanted to sail
her!
after
my wife "Teresa Ann" took to the water two summers ago (2003), less
the sailing rig and was every bit the great little "leaf on the
water" dingy I had remembered. Teresa and I had a ball rowing her around
the boats near our mooring, exploring nooks and crannies, and teaching kids the
fine art of getting somewhere on the water via oars. But I wanted to sail
her!
This summer, after an amusing conversation with Harold "Dynamite" Payson who scoffs at people spending big bucks on expensive wood for spars, I went down to The Home Depot, found two 2x4s 14' long, clear as a bell, laminated them together and made my mast. The boom came from a very nice and straight piece of pine lath I had sitting around in my shop. I had just finished reading a book about sewing your own sails so I thought I'd give it a try.
The company I work for builds fiberglass bathing equipment that is sold to Nursing Homes all over the country. We have a sewing department that makes shower curtains unique to our size showers. The fabric is a lovely white, synthetic material of just the right "heft" for a dingy sail so I bought enough to make two sails and set to work. The finished product came out even better than I had a right to expect. I even made my own sail bag. I bought some sailmaker's insignia cloth, sticky backed, in red and cut out my own version of the "8-Ball" logo for the sail and the sail bag. I even made my own white oak battens and installed them into 18" batten pockets.
The hull is made from luan plywood purchased at Home Depot. Luan is a millimeter or so thinner than standard 1/4" plywood but finishes beautifully and is very reasonable. The keel and other members are made from some scrap redwood I had laying around. The whole boat was built on a "shoe string" and came out just great. (Hey...maybe I SHOULD have named it "shoe string" :)
The attached photos show the boat, spars, sail and sail bag and a "quick and dirty" rudder and tiller. I didn't take the time to varnish the rudder or tiller as cold weather was setting in and I wanted to get the boat in the water last weekend (Oct. 22nd) and at least say I had sailed her before the end of the season.
Feel free to use as many or as few photos as you like and, of course, interested folks can contact me at: Kwesting@aol.com with any questions or comments.
Thanks again for a great design and for always being there to answer all my questions.
Another gloomy Saturday
by Bob

I am sitting on a stool, leaning against my latest project and looking out the window. I had planned to do some clean up in the yard, but it's a bit chilly. A good day to be working on a boat in a warm shop... well, relatively warm. There's been a lot going on around my house this year, so my boat is evolving very slowly. At this rate, it will be awhile before she matures into boathood.
Winter is a good time of year to be building a boat. My wife comes out into the garage to sit on evenings when she isn't involved in a book. We talk about the day, grandchildren or whatever, as I putter, drill or glue. She lends a hand when fitting longitudinals or planking. She doesn't really like to build, but is a great watcher and good company.
Last weekend, my grandson spent two days with us. I had a lot of maintenance to do in the yard, and he was my helper. But he really wanted to "help" with the boat. So in the evening, Paul sanded frames for a while and then pounded nails into scrap wood while I beveled the forward frame. Grandma came out with hot-chocolate and cookies and we all sat around a storage box table and talked about where we would go in our boat when she is complete.
So, here I am on a cold day thinking about boat building. I've read what others have had to say about their projects. "Fun" seems to be the word used most often to describe the building process... I guess I would use "satisfying". I have cut several pieces of scrap wood into boat shapes for Paul to "work" on when he next visits and think we might take one to the pond and float it, tied to some fishing line.
As I look out the window, my thoughts are not of being out on the water, but of quiet evenings working in the shop, drinking hot-chocolate, talking to my wife and helping Paul build his boat. Yes, I guess I would describe boat building as satisfying. If you are working on a boat building project this winter, be sure to involve the family, or even a favorite neighbor. Working on a boat is a good background for living.
Book: "The Building of a Dream -- Journal of the Molly B"
by Tom Schmidt
I received a copy of Tom's book about building his Yukon/Argosy in the mail. This is a cleaver way to raise boatbuilding funds. It is also a great book for anyone interested in building one of the trawlers or any large boat. The copy below is taken from the book and Tom's website.
Welcome to the on line version of my journal of my boat building project. For a complete detailed printed version see below. I have been looking at boats for many years, motor sailors, houseboats, and trawlers. I decided I wanted to build one, so I started by doing a lot of research on the subject. I think I have purchased every book on the subject I could find. After several years of research, I decided I wanted to build a Trawler. I started looking for plans and found a couple available from Glen-L. I ordered two different sets of plans, one for a 42 footer called the Argosy, and one for a 35 footer called the Yukon. I liked the plan view of the Argosy but it was a little bigger than I wanted to attempt building. The Yukon was a little smaller than I wanted and I didn't like the layout of the plan view. So, I finally found a boat with the layout I liked, so I decided to use the Yukon plans and stretch them to about 40 feet and change the floor plan to the boat I found onto the hull of the Yukon.
I am making a printed copy of my journal available to help with the construction costs of the Molly B. Volume I is available now and Volume II will be coming soon. Now you can purchase a detailed printed copy of "The Building of a Dream -- The Journal of the Molly B " Volume I. Volume I contains 152 pages with 396 photographs, each with a detailed personal explanation of how I did it and covers construction from conception to the turning of the hull.
160 pages, 8.5 x 11.0 in. (Workbook Size), coil-bound, black and white interior, $26.49
Anyone who wants a cruising yacht -- can have one! Just build it yourself. You can do it, there is a multitude of help out there. All you really need is the perseverance to complete the project. Volume I of "The Building of a Dream" covers building a model, site preparation , hull construction, and building your own marine engines. 396 photographs in 152 pages illustrate every step of the process accompanied by a detailed explanation of how I did it. http://home.att.net/~schmidttl/.
Designer's Notebook: Did you ever make a mistake?
Obviously, if you said, "No" you are telling a big fat lie; we all make mistakes. Some are minor, some quite stupid, but in the case of boatbuilding, most are correctable. Over the years we've heard of many mistakes builders have made in building their boat. The following lists a few examples that should provide a snicker and perhaps a good feeling that the mistake you just made pales in significance to the goofs others have made. A few years ago a fellow dropped by and stated he had made the frames but couldn't understand what to do next. He had several frames crammed into his car. And they were beautifully made, top grade mahogany, neat (no lumps of glue) everything indicated fine workmanship. BUT, the frames had been made in halves. Why? The patterns showed only half the frame. He ignored the drawings and instructions that stated the patterns were in half section symmetrical about the centerline. He was such a nice guy too. But, yes, he did complete the boat and did an excellent job. Then there was the guy who couldn't bend in the longitudinal sheer member without breaking it. Questions as to the type of material and quality, size of member, large holes for fasteners at frames, and other pertinent questions were asked. Not an incorrect answer! The next step was to review exactly what he'd done. Everything was great UNTIL he described notching for the angularity, particularly in the forward frames. Typical construction described in the plans and pictorials illustrate beveling the frames so the longitudinal member fits flat. BUT, he decided notching the longitudinal was easier. This in turn weakened the member to the point it would virtually break with almost any bend. When the correct method was explained he simply hung up the phone and cut the conversation short. The best or worse, depending on the outlook, was the builder who made a mistake and did the almost impossible with no good way to correct the error. In many designs, the fabricated frames are mounted on longitudinal "set up" members that may or may not remain in the finished boat. Many of these set up members are tapered or cut away so battens or the plywood planking won't contact them. A builder phoned and stated he had the hull finished but a bump, quite large, protruded from the forward bottom section of the boat. This was a new problem, and, for a while we were mystified; then the light went on; could he have possibly forgotten (?) to trim the end of the set up member as shown. Yep, that's what he'd done. Now was our turn to question him. How did he ever bend the planking around the bow without breaking it. The builder admitted that it was a tough bend and had taken several helpers and application of hot water to spring in place. From a logical standpoint the bend couldn't (?) be made. How did he fix the goof? We never found out. The above examples are extremes. Most mistakes are minor and readily corrected. But, just perhaps, the above examples make that last goof made in your boatbuilding project not so bad after all. |
The history of Budlight
by Lloyd Corliss
Based on the IMP plans from Glen-L.com, received in July 2004.My IMP is named Budlight, a name that has no special meaning. She was launched October, 2005, at Lake Cachuma near Santa Barbara, CA. The launch went well and the lake was calm. The plans were easy to follow, but took me much longer to finish than other builders. Perhaps that is because I am 81-years-old. It was not simple to build, but I did not encounter any problems.
Some details:
- WOOD - Longitudinals made from 80-year-old Douglas-fir, salvaged from the rebuilding of the Stearns Wharf in Santa Barbara. The 6" x 8" x 8' beams were resawn on a Craftsman 10" circular saw. Scarf-joints used to extend the chine, sheer and some battens.
- WOOD - Redwood seats made from wood salvaged from a 100-year-old water tank in the Mojave desert.
- Plywood planking: Marine-grade 1/4"; transom: 3/4" marine-grade
- Glue - Poxy-Grip
- Fiberglass cloth - Heavy-duty
- SEATS were made from redwood slats fabricated with epoxy glue and brass rod.
- Plywood secured to the frame with staples and epoxy.
- Fiberglass resin - applied with a roller.
- Varnish - Marine spar
- Paint - Rustoleum applied with a roller.
- Power - Powered by an antique Seagull motor that required a machined piston
and rod as well as a gear cover
- Heli-coil inserts - numerous were used.
- Carburetor - Replaced with a re-built Honda carburetor to improve low-speed performance.
I had fun all the way, from beginning to end... if that ever comes.
Inboard Hardware: Automobile Motors to Marine Use
Converting an automobile motor to a viable marine engine has been going on for years. Although, going back in memory, many of these conversions were disasters waiting to happen.
Very early conversions simply amounted to lifting the motor with transmission from the car and slapping it in a boat. Several things were quickly learned. The exhaust manifolds became red hot and the circulating water pump didn't adequately cool the motor as a radiator and rush of air through it was not used. Since the motor was set in at an angle, the carburetor would flood and the oil pickup in the pan would run dry. The transmission was never intended to absorb the forward and reverse thrust of the propeller, and the clutch and very low speed of the reverse made rapid braking impossible. These are but a few of the problems; most were quickly solved.
Today there are conversion parts for popular automobile motors to make them viable marine power plants. But that doesn't mean that any motor can be taken from an auto and converted for marine use. Conversion parts must be sold in quantity to make a profit. Just the water-cooled exhaust manifolds patterns and tooling for a given motor will run into thousands of dollars. The consumer pays for that tooling in the long run so the more identical motors used in autos the more likelihood that it will be a viable candidate for conversion parts.
A prime example is the so-called small block Chevy, first used in autos in the late fifties and still in use today. No, it's hardly the same motor, but the basic block pattern for major bolt-on appendages has remained essentially the same. This means there are lots of these motors available and used in boats more than any other. Check the past few years and you'll find this motor was the basic power plant for many marine motor manufacturers.
There are many motors that would be ideal for boats, but conversion parts are not made. Marine motor manufacturers have used some, but individual parts are not available. It is possible to buy the manufacturers marine appendages and put them on a basic automotive engine block, but the cost would be prohibitive.
Can't you make the parts? Possibly, but doubtful, or maybe yes and no. Motor mounts, cover plates, pump adapters and many other parts have and can be made. However, making marine exhaust manifolds is another story. A marine manifold jackets the exhaust chamber with water. Making and welding a manifold so each chamber is separate plus, fitting it to the block-bolting pattern is a formidable project. Many have tried but, in our experience, few have succeeded in making a useable manifold.
What about the transmission? Marine transmissions are readily available and, with an adapter plate, will fit to almost all automobile motors. What about using the auto automatic transmission in a boat? It can and has been done, but, with older transmissions and internal changes. Such a transmission will be considerably longer than a marine gear and it won't take the forward and reverse thrust. Shifting from forward to reverse as a brake may create excessive wear on the auto transmission. Then, too, the unit probably reduces the rpm's in reverse. It's difficult to duplicate the marine gearbox by converting an automotive one unless you are particularly adept and very familiar with the inner workings of these units.
Be warned. If you get a chance to get a motor from Aunt Gertrude's low mileage old car, pause for a moment. Be sure you can get the parts required to marinize it before congratulating yourself.
Footnote: For a detailed description of auto to marine motor conversion see the book INBOARD MOTOR INSTALLATIONS available through GLEN-L. For more details about specific pieces of hardware, see our Inboard Hardware Catalog.

Launchings
According to the survey that Gayle sent out, a great many of you read WoodenBoat magazine. WoodenBoat has its headquarters in Brooklin, Maine... a long way from Southern California. You suppose that is why very few Glen-L boats end up in the Launchings section? Couldn't be east coast bias, could it?WoodenBoat magazine:
Launching pages are dedicated to sharing news of recently launched new boats
and "relaunched" (that is, restored or substantially rebuilt) craft.
Please send photos (see below) of your projects to:
Launchings
WoodenBoat
PO Box 78
Brooklin, ME 04616.
Include the following information:
(1) length on deck; (2) beam; (3) type, class or rig; (4) boat's name; (5)
names and addresses of designer, builder and owner; (6) port or place of
intended use; (7) date of launching (should be within the last year); (8) brief
description of construction or restoration.
|
Hints for taking good photos of your boat:
We enjoy learning about your work - it affirms the vitality of the wooden boat community. Unfortunately, a lack of space prevents publishing all the material submitted. If you wish to have your photos returned, please include appropriate postage. |
Feedback: Tango
by Ed Vernon
I finally found time to send an update. This has
been a busy summer. We have sailed our Tango four times
this summer. We are enjoying it very much. The wife and I are novice sailors
but we learned a lot this summer sailing on a local no-wake lake that is known
for surprising winds. Sorry, but we were too busy sailing to get any pictures.
I think we have gotten over the "heeling fear" now and we look
forward to our next time out. ![]() I have purchased slugs for the mainsail.
Dousing the main is slow without them and those "surprising winds"
almost require being able to quickly lower the main. The interior is still in
the rough but we have overnighted on the lake while rafted up with others. I
hope to work on the interior this winter.
I have purchased slugs for the mainsail.
Dousing the main is slow without them and those "surprising winds"
almost require being able to quickly lower the main. The interior is still in
the rough but we have overnighted on the lake while rafted up with others. I
hope to work on the interior this winter.
I managed to break the tiller when a friend stepped
![]() onto my boat as I was stepping off the other side. My bottom met
the tiller and the cockpit simultaneously. The day was saved by friends who
found a piece of drift wood that complimented the rudder nicely. We were able
to bolt it through what was left of the original tiller and wrap it in rope.
When I got this back home I liked it so much that I reworked it with better
bolts and better looking rope, and then fiberglassed the drift wood to add
strength. I have a most unusual tiller now. I have attached pictures.
onto my boat as I was stepping off the other side. My bottom met
the tiller and the cockpit simultaneously. The day was saved by friends who
found a piece of drift wood that complimented the rudder nicely. We were able
to bolt it through what was left of the original tiller and wrap it in rope.
When I got this back home I liked it so much that I reworked it with better
bolts and better looking rope, and then fiberglassed the drift wood to add
strength. I have a most unusual tiller now. I have attached pictures.
We are still having great fun with this whole sailing thing and we have made many new friends. Thanks to everyone at Glen-L. We could never have done this without all the support. I will continue with updates as time allows.
 I've got to get together with Bob... I like that "background for living" thing. |
Recent email:
Subject: Re: Glen-L Questionnaire
Date: Mon, 14 Nov 2005
Hi Gayle
Thank you for your personalized reply.
That in itself will pay dividends to your business I am sure. One often wonders
why bother responding to these sort of things as they are usually so impersonal
but you have done well, Thank you.
Yes I had already noticed the new photo on the catalogue page and I was
flattered.
Best regards
Roy Gadischke
So, at 57 I'm running from old age in a bright yellow boat. ...Dan Crummett
Subject: I DO love this boat...
Date: Mon, 31 Oct 2005
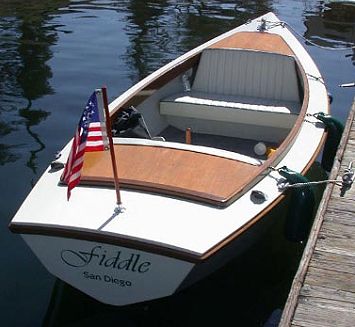
Took the little Amp Eater (which I have renamed Fiddle) out on the Big Bay yesterday. Probably wasn't the best day for it, since the tide was running against the wind, and there was lots of chop and wake slop. The little craft marched ahead bravely, climbing over the big ones and shrugging off the smaller ones. Nary a drop came aboard. The little one-horse motor and its big bronze prop got us where we were going, even directly into a good sailing breeze, and home safe again, with no complaints.
Thanks again for a great boat.
Best regards,
Gary Williams
Below is the result of your feedback form. It was submitted on Wednesday,
October 26, 2005
-----------------------------------------------------------------
name: Bill Davis Jr.
Comments: Very Good information on rigging a
small boat. I am thinking of designing my own and building one this Winter
Spring 2006. Information on this WEB site is very well done and I look forward
to coming back often.
Thank You
Bill
Subject: Sea Knight Pictures
Date: Mon, 24 Oct 2005
Here are photos of a Sea Knight lengthened approx. 20" and beam increased approx. 10" This boat was just finished in the past 45 days.
Dale
Indy
From: Barry Witt
Sent: Tuesday, October 25, 2005
To: Dale Smith
Subject: Re: Sea Knight Pictures
Interesting... that is Charles Bresette's boat. He made no comment about extending nor widening the hull.
Barry
Subject: RE: Sea Knight Pictures
Date: Tue, 25 Oct 2005
Barry, I met Charlie on the Glen-L site via CUSTOMER PHOTOS. He does state in his story on the site that he made some changes that would be revealed at a later date. Maybe he was concerned you would SCOLD him? hehehe. I asked him if it were ok that I talked about the changes and he said yes. I believe he said he had made you folks aware of such RECENTLY. Charlie is a great person as you know. He and I talk nearly every day, and he has been of great help to me. He speaks very highly of you all too. I recently drove from Indy to his place and spent 5 hours with him in the boat and in his shop. He loaned me the patterns that he changed in order to increase the beam to 8', and it appears to me that he had given the changes a lot of thought. He showed me his 27" model he made FIRST before he increased the beam. He was concerned about the PROPORTIONS, plus other factors. He basically took the floor plan, cut with scissors right down the middle, spread the two pieces and then added length to reach the stem point. May not work in many designs, but seems to have with the Sea Knight. It also appears that he added bracing within the floor and bottom too. I have not compared these to plans though, so can't say for sure. I believe he said he did though. He has given to me over 320 pictures on two CD's of this building process. GOT TO LOVE THAT CHARLIE.
The added length and beam really opened up the interior, and is one of the deciding factors I used in building the Sea Knight. I am going to make a lot of changes to the interior, but the exterior profile will retain its great lines. Love the picture of the lady and man waving from the boat that is in the Sea Knight listing.
I will be doing the hull and deck in Mahogany and very little paint. I have been reading with great interest the vacuum process of gluing the top layer. I am giving serious thought to the first layer being plywood and 1/8" X 4" X ?" individually cut planks as my top layer.
Thanks Glen-L for the great products, and service. Love the site too.
Dale
Indy
Our sharing 96% of our genes with a chimpanzee sounds impressive until you know that we share 40% of our genes with a banana.
Subject: Cabin Skiff
Date: Sun, 16 Oct 2005
Hi to all at Glen-L, As you can tell by the continuing additions to my web site I am still using and enjoying my Cabin Skiff. Earlier this month I passed the 20,000 mile mark and with a trip last week to Chattanooga, TN I now have over 20,800 miles on her. Obviously, this is a lot of miles on an 18' boat! Although still sound as the day she first hit the water, there are a number of scrapes and rubs that need attention. I have decided to put her into the shop this fall and give her the attention she deserves. I hate to have her out of service for a couple months but a new coat of paint will make her look like new again.
Once again, thanks for the great design and helping me bring it all
together. There is no price I can place on the hours of pleasure Therapy has
allowed me to experience.
Ray Macke
Below is the result of your feedback form. It was submitted on Friday,
October 21, 2005
-------------------------------------------------------------
Comments: Yours is one of the most dependable companies I have ever
experienced. While I occasionally order a little epoxy for repairs I did build
your GL 21CB
sailboat back in the 70's before we dealt with the Internet. It was a very
fine sailboat that I have always treasured in my memory as I graduated to
larger craft. I sailed it on reservoirs in Pennsylvania, the St. Lawrence River
and then for a few years on the Chesapeake Bay. I made the mistake of selling
to a friend who left it deteriorate but wouldn't sell it back to me.
My present project is rebuilding two coaming boxes for my son's 30'
Columbia sailboat on Lake Ontario.
Thank you for the good service.
Don Welsch

GLEN-L boats, of course